The configuration of GoPro remote control feature has changed quite a bit for RaceChrono v6.2.1, and this tutorial applies only this version or newer. For the most parts this tutorial applies to all GoPro models, but some steps are specific for certain camera models or phone operating system.
Camera configuration
- Please familiarise yourself with how to record video with the internal camera first.
- Make sure your camera has been paired with your phone. Only way to do this properly, is to install the official GoPro app, and pair it with your camera. Notice: We acknowledge that the official GoPro app might no longer be available for older phones. GoPro HERO 3-4 will work just fine without pairing with the official app. Also GoPro HERO 5-7 can still be configured with “Use Wi-Fi only” setting in RaceChrono, as long as the camera has been paired with the official GoPro app on some phone (not necessarily the RaceChrono phone). Remote controlling GoPro HERO 8 on the other hand will not work if not paired with the official app!
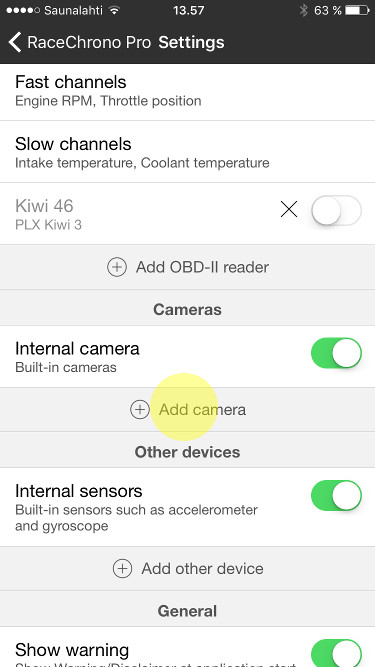
- Go to RaceChrono > Settings and tap the ‘Add camera’ button.
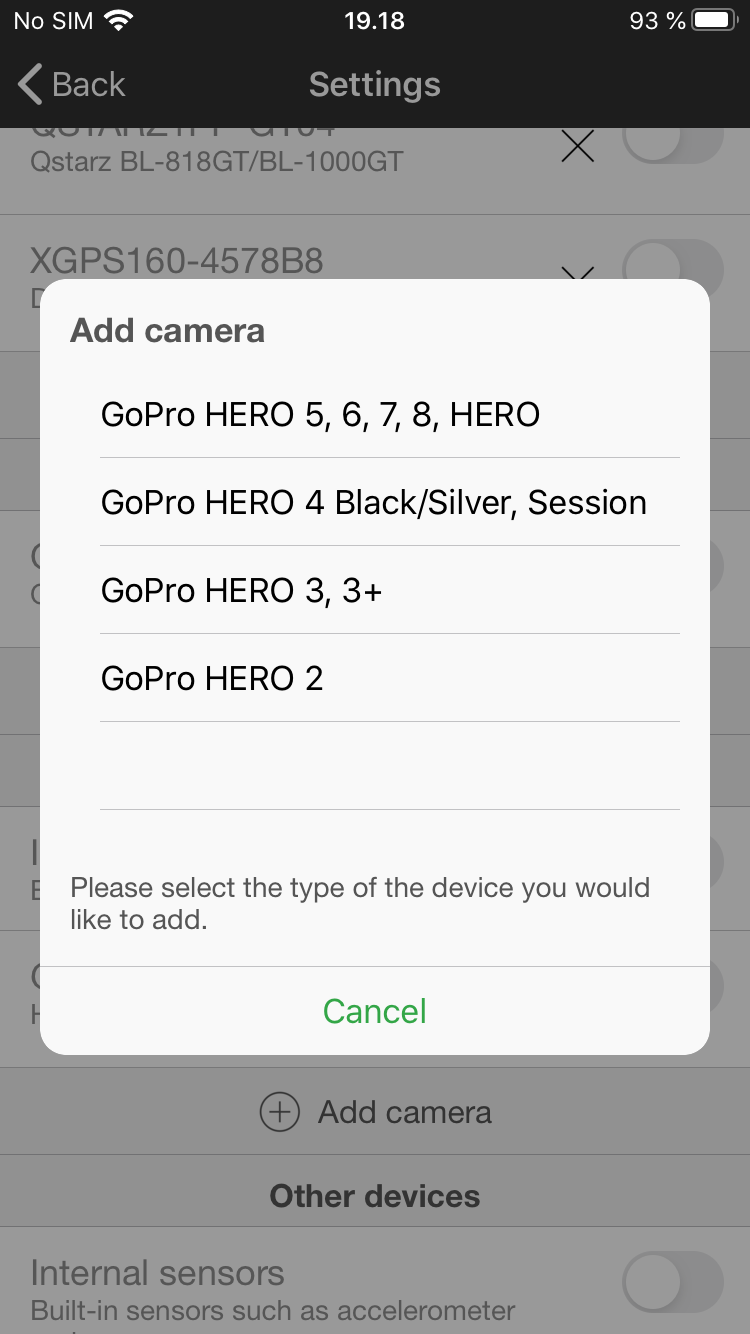
- Carefully select your GoPro model from the list.
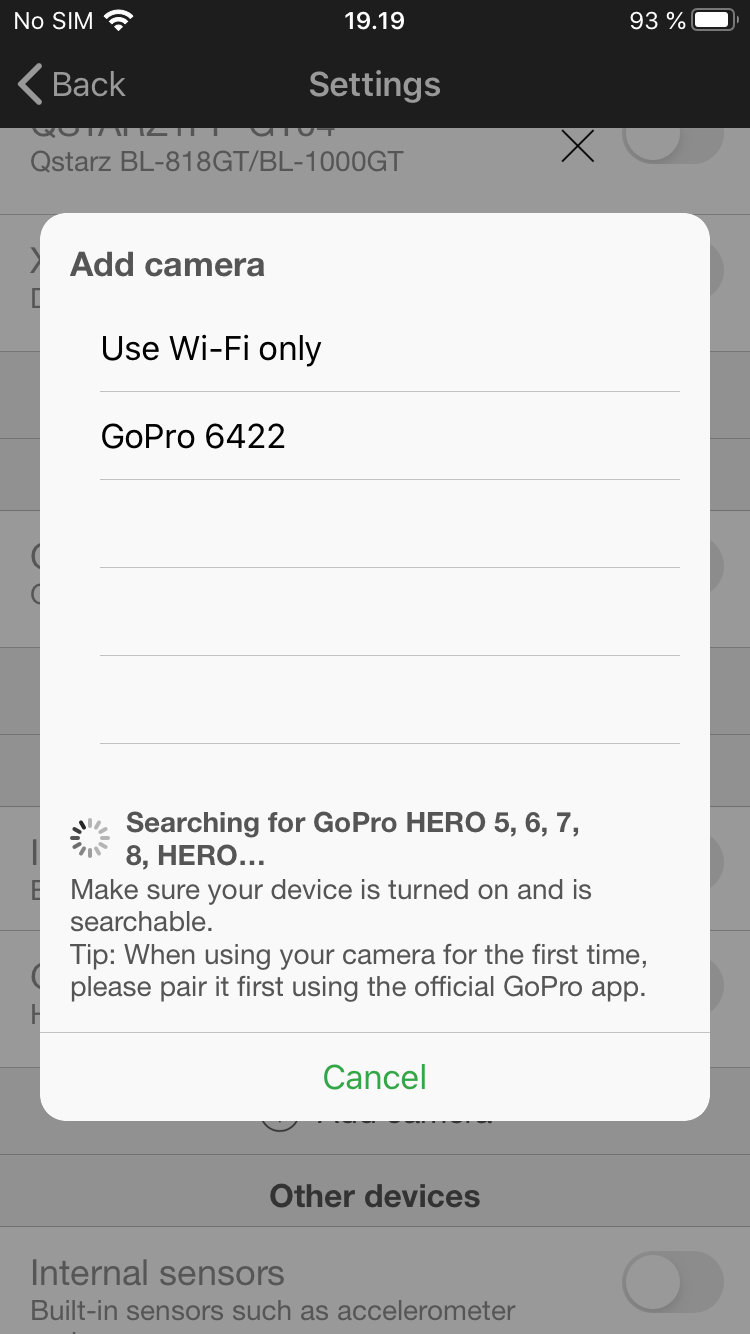
- GoPro HERO 5, 6, 7, 8 and newer: Turn on your camera and select it from the list, after it appears to the list. Your camera will show up with its Bluetooth name, not with the user configurable Wi-Fi name. Here you also have the “Use Wi-Fi only” option. If selected, RaceChrono will connect your camera camera without a “Bluetooth handshake”, which automatically turns on your camera and resolves its Wi-Fi name and password.
- Enter your camera details to the configuration page if needed. Depending on your camera model, you may have a different selection of configuration options.
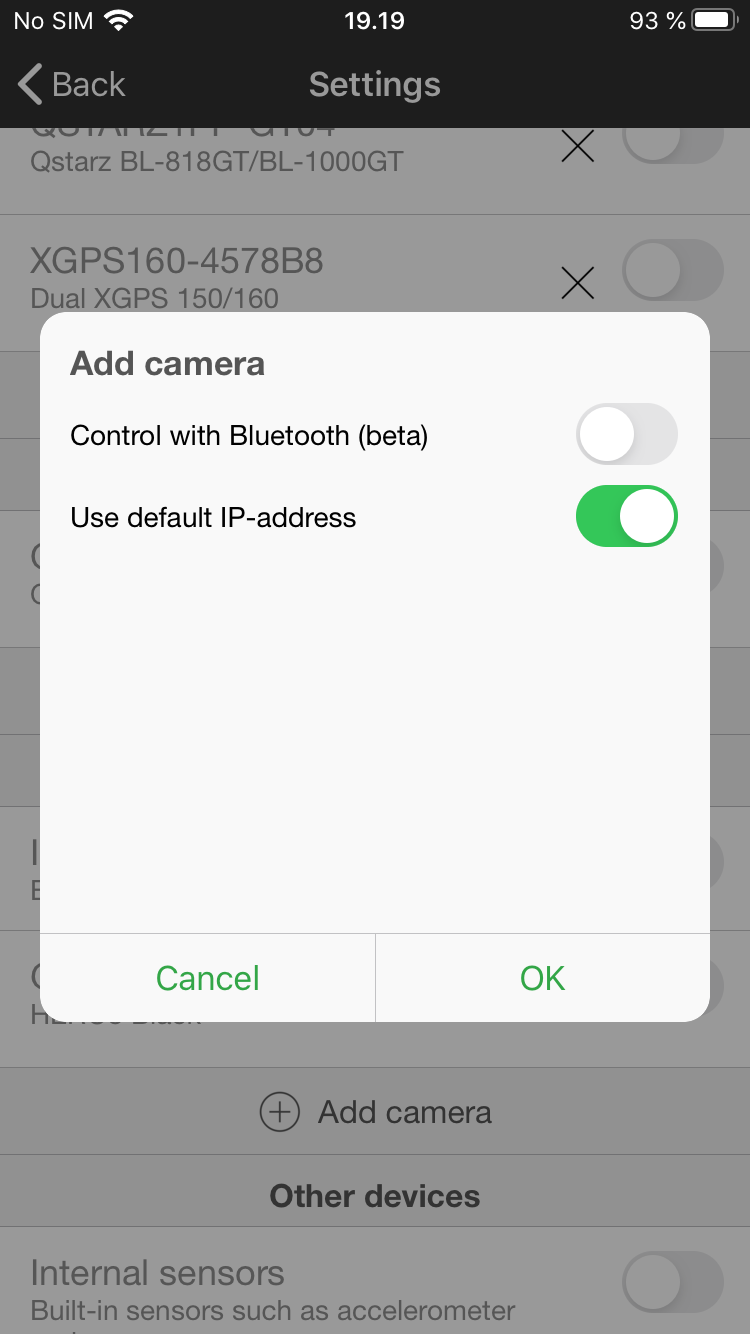
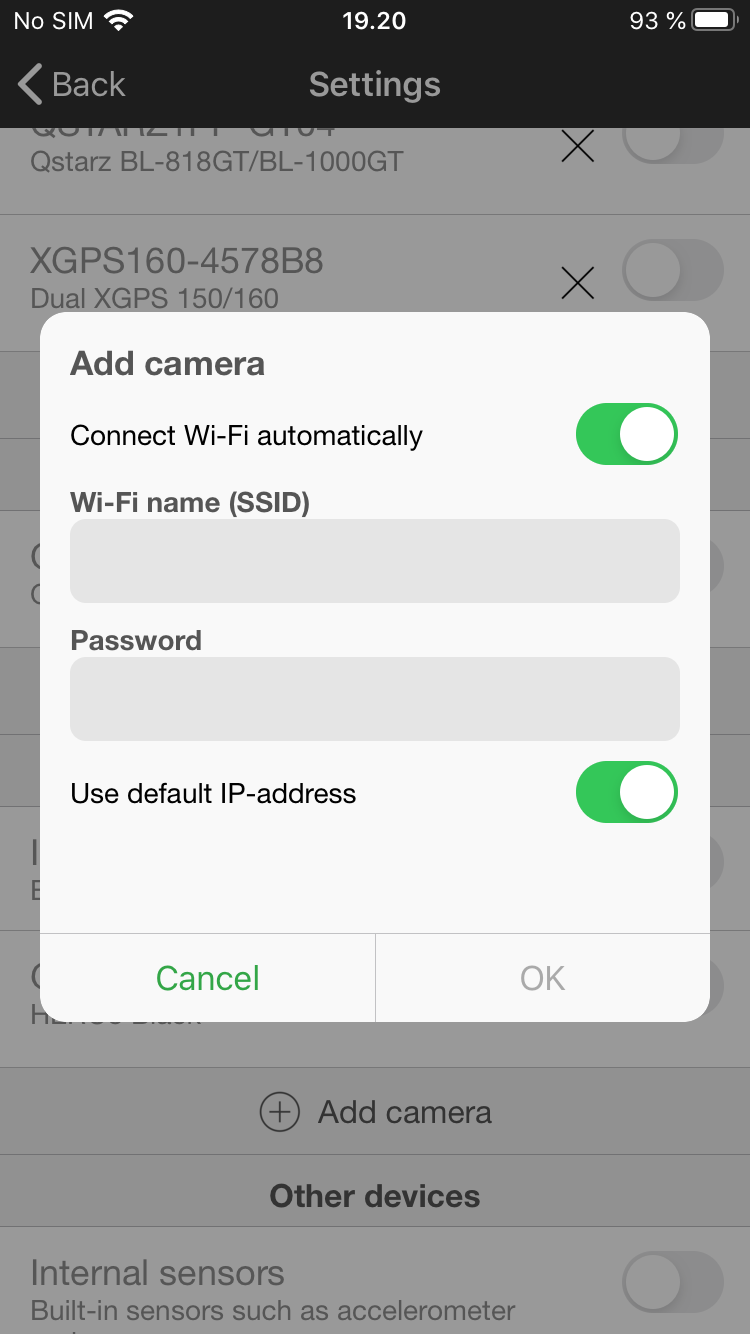
- Connect with Bluetooth (beta): When this setting is enabled, RaceChrono will control your camera through Bluetooth. A Wi-Fi connection will be needed only when camera preview is enabled or files on the memory card are being accessed. This feature is beta quality and it does not work reliably with some Android phones. Available for GoPro HERO 5 and later.
- Connect Wi-Fi automatically: When this is enabled, RaceChrono tries to connect to your camera’s Wi-Fi automatically. Correct Wi-Fi name (SSID) and password is required when this option is enabled. Not supported on iOS 10 or earlier. Notice: When this option is disabled, or not supported, you will need to manually connect to your camera Wi-Fi before trying to connect with RaceChrono.
- Wi-Fi name: Wi-Fi name of your camera. Case sensitive. Available in “Camera info” menu of GoPro HERO 5 and later.
- Password: Wi-Fi password of your camera. Case sensitive. Available in “Camera info” menu of GoPro HERO 5 and later.
- Use default IP-address: Keep this setting enabled unless you know what you’re doing.
Recording videos using your GoPro camera
- Turn on your camera.
- GoPro HERO 2, 3 and 4 only: Make sure your camera’s Wi-Fi has been turned on. The Wi-Fi is already turned on, if you’ve just connected using the official GoPro app. If you have GoPro HERO 5 and later, you can assume Wi-Fi (or “Wireless”) is turned on after you pair it with the official GoPro app.
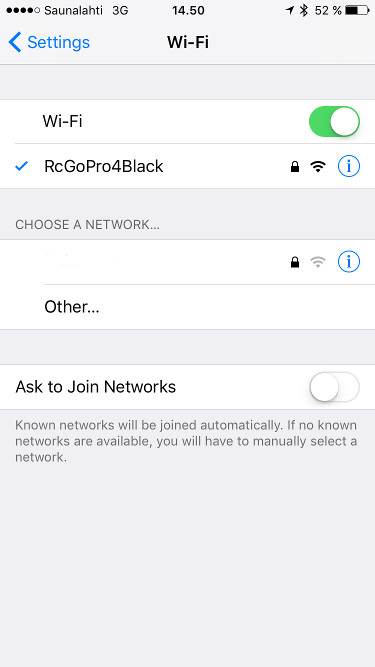
- Only if setting “Connect Wi-Fi automatically” is disabled or unsupported: Manually connect switch your phone to the camera’s Wi-Fi network. You will always need to do this on iOS 10 or earlier, as the automatic connection is not supported there.
- Start new RaceChrono session and switch to the camera preview screen. RaceChrono then starts connecting to your GoPro camera.
- iPhone and Android 10 or newer only: RaceChrono will ask permission to join the camera Wi-Fi network. If the Wi-Fi is once gained and then lost, RaceChrono will be unable to reconnect to it automatically. You’ll need to reconnect manually or disable+enable the camera from the preferences box.
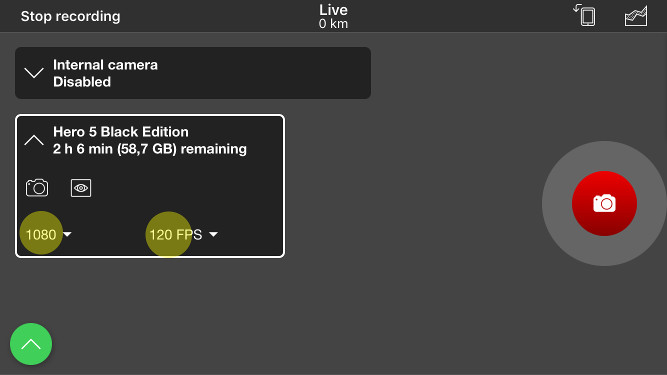
- Both internal and GoPro cameras are used for video recording as default. You can disable either of the cameras from the camera preferences boxes. You can also change your GoPro resolution and FPS settings.
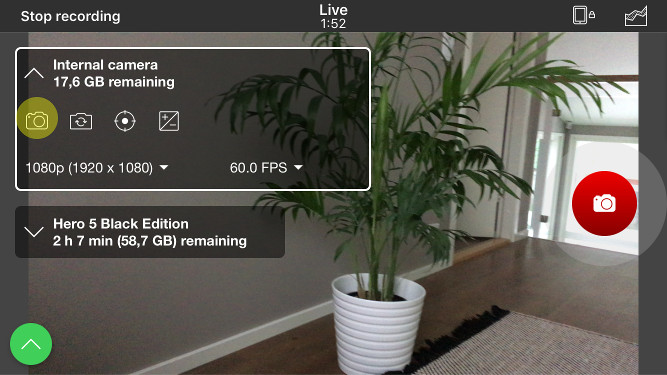
- You can disable (and enable) the camera preview by tapping the preview icon. The preview will be turned off once recording is started. Camera preview will need Wi-Fi connection to work. Notice that GoPro 3 or earlier camera preview is not supported.
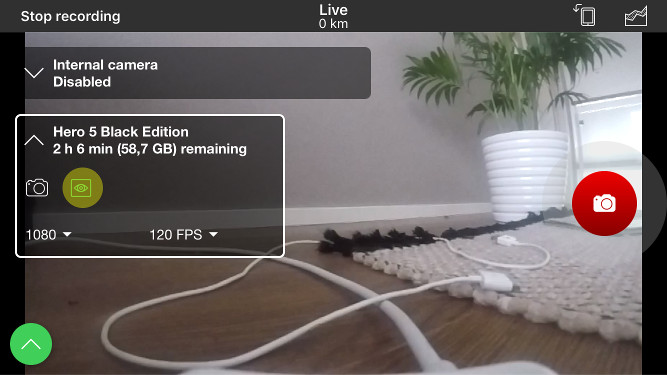
- Tap the ‘Record video’ button on right side of the screen to start recording video. Your GoPro action camera should start video recording immediately. Same button (or ‘Stop recording’ button) will also stop the video recording.
- The video files will appear as “placeholders” in your session’s video list, as they cannot be downloaded while recording. After recording your session and its videos, the next step is to copy the video files over to your phone, or download directly from your session’s video list. For GoPro 5 and later, you will need to connect to your camera again from your session’s video list, in order to resolve the video file names that have been recorded.
Troubleshooting
- Make sure you have recently paired your camera with your phone using the official GoPro app. The pairing might have been lost since the previous time you user the official app, so re-pairing might fix your issues.
- If you’re having trouble connecting, or maintaining connection to your camera, please make sure you have “Connect Wi-Fi automatically” setting disabled. The automatic connection can be tricky, and does not always work reliably. When this setting is disabled, you’ll need to manually connect to your camera’s Wi-Fi before starting a new session.