RaceChrono Pro supports linking video files to your sessions from virtually any external camera, as long as the video file format is supported by your phone. You can create the links and sync points by creating the links manually (preferred way), or using the GoPro remote control feature. Which ever method you choose, you will still need to copy the actual video files over to your phone or tablet.
The preferred method for copying the files to your phone is the RaceChrono’s Import feature. You can use this feature for copying over the video files, as well as importing sessions from GPS enabled GoPro video files, as well as importing sessions from files created by external data loggers. This tutorial will discuss only copying the video files over. See the following article for importing standalone sessions from GoPro video files.
A1. iPad/iPhone: Importing video files directly from a memory card
- Purchase Apple’s memory card reader, it’s relatively affordable at $29 / 35 EUR.
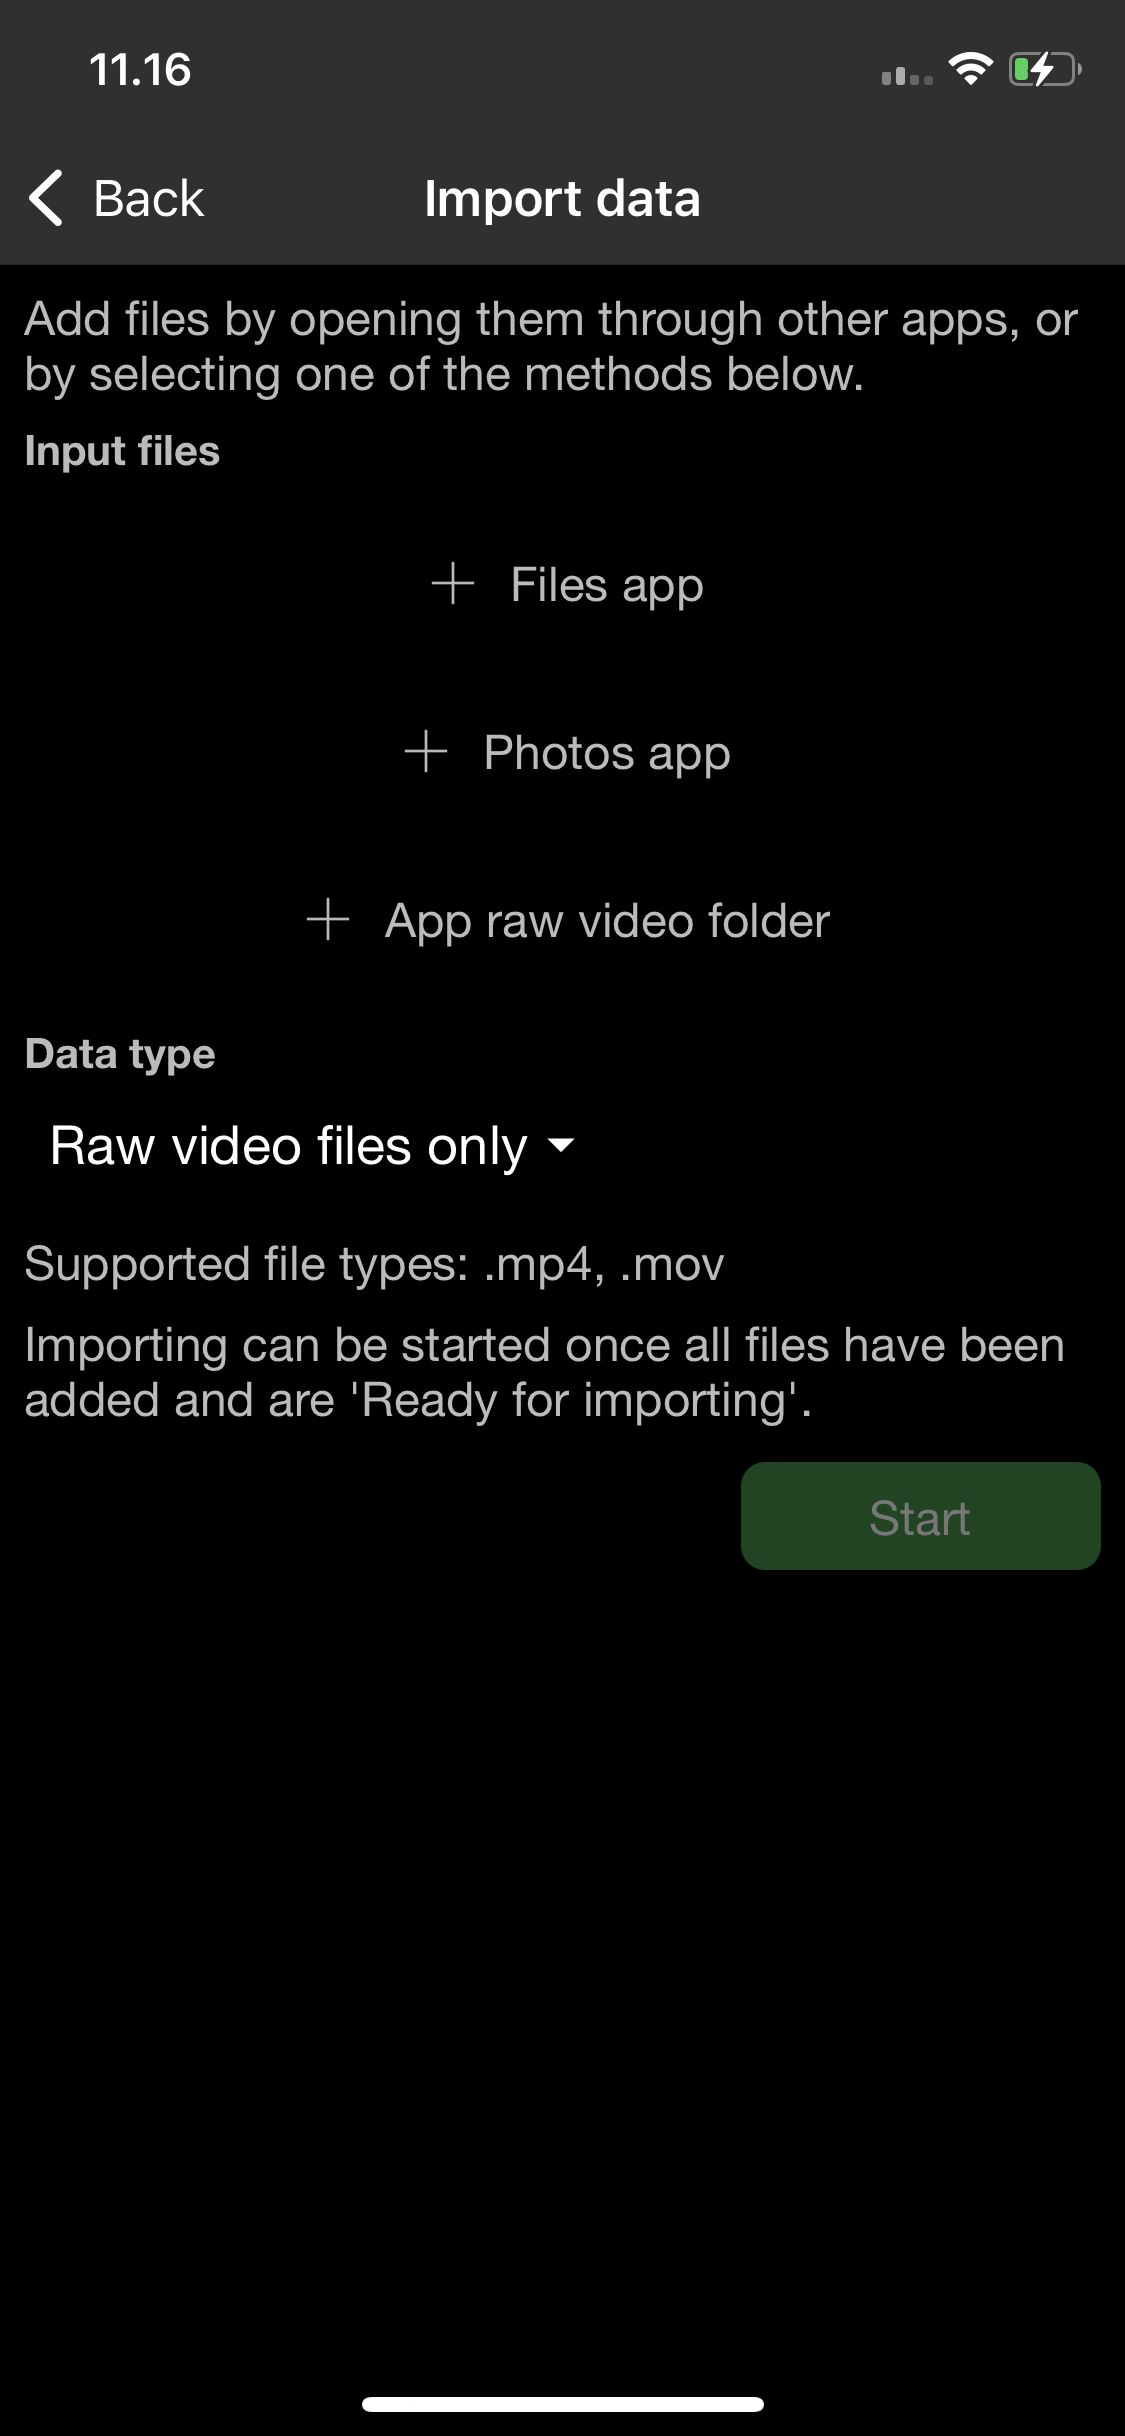
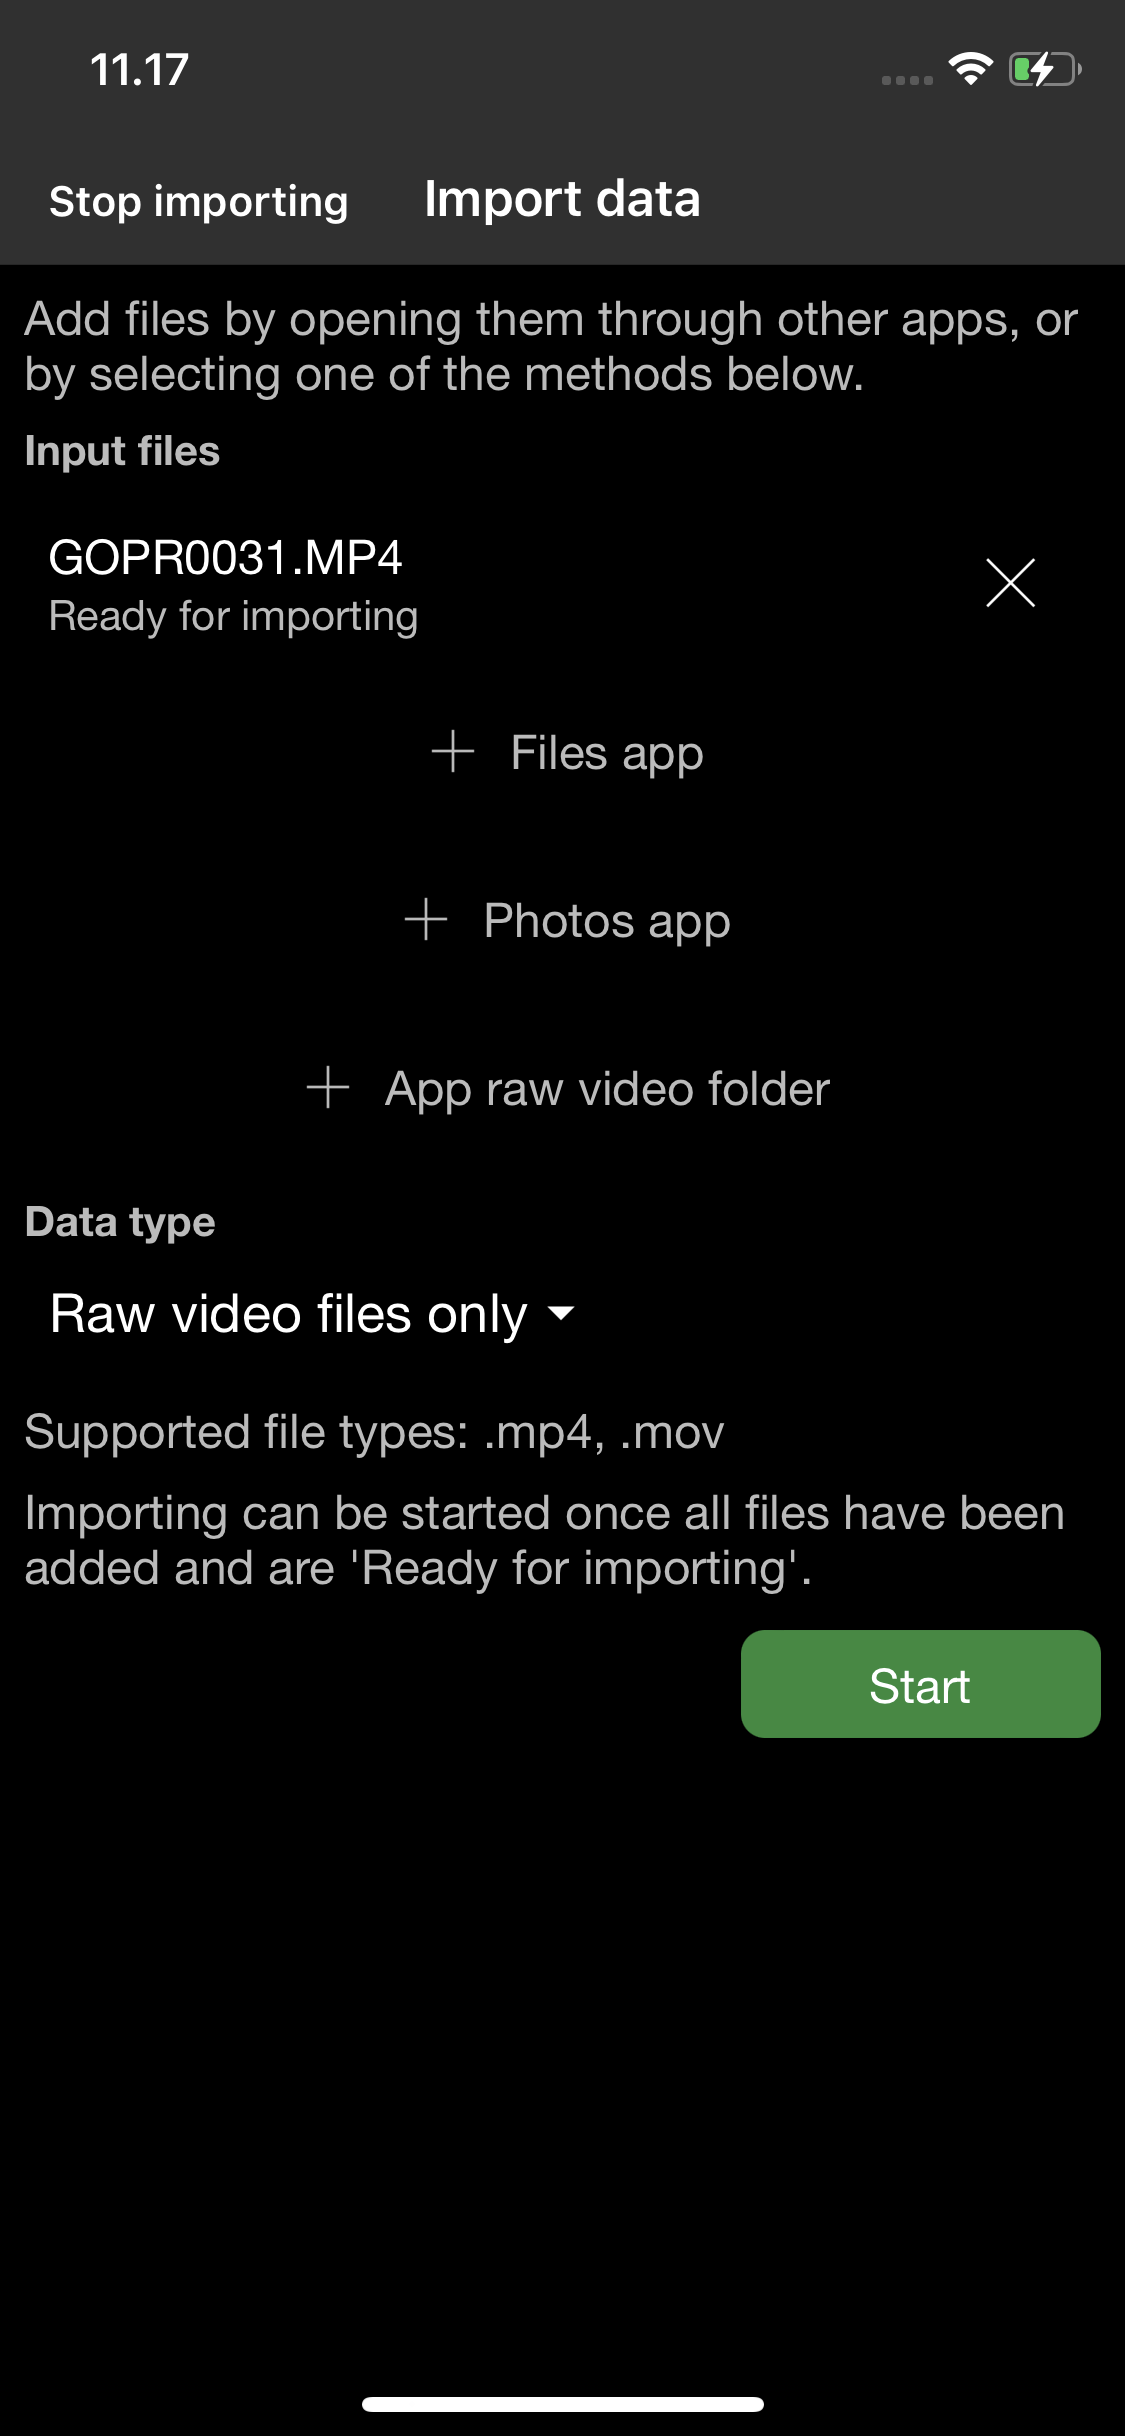
- Open the Import screen from the Main screen’s top menu. Select “Raw video files only” as the data type, and then select “+ Files app”.

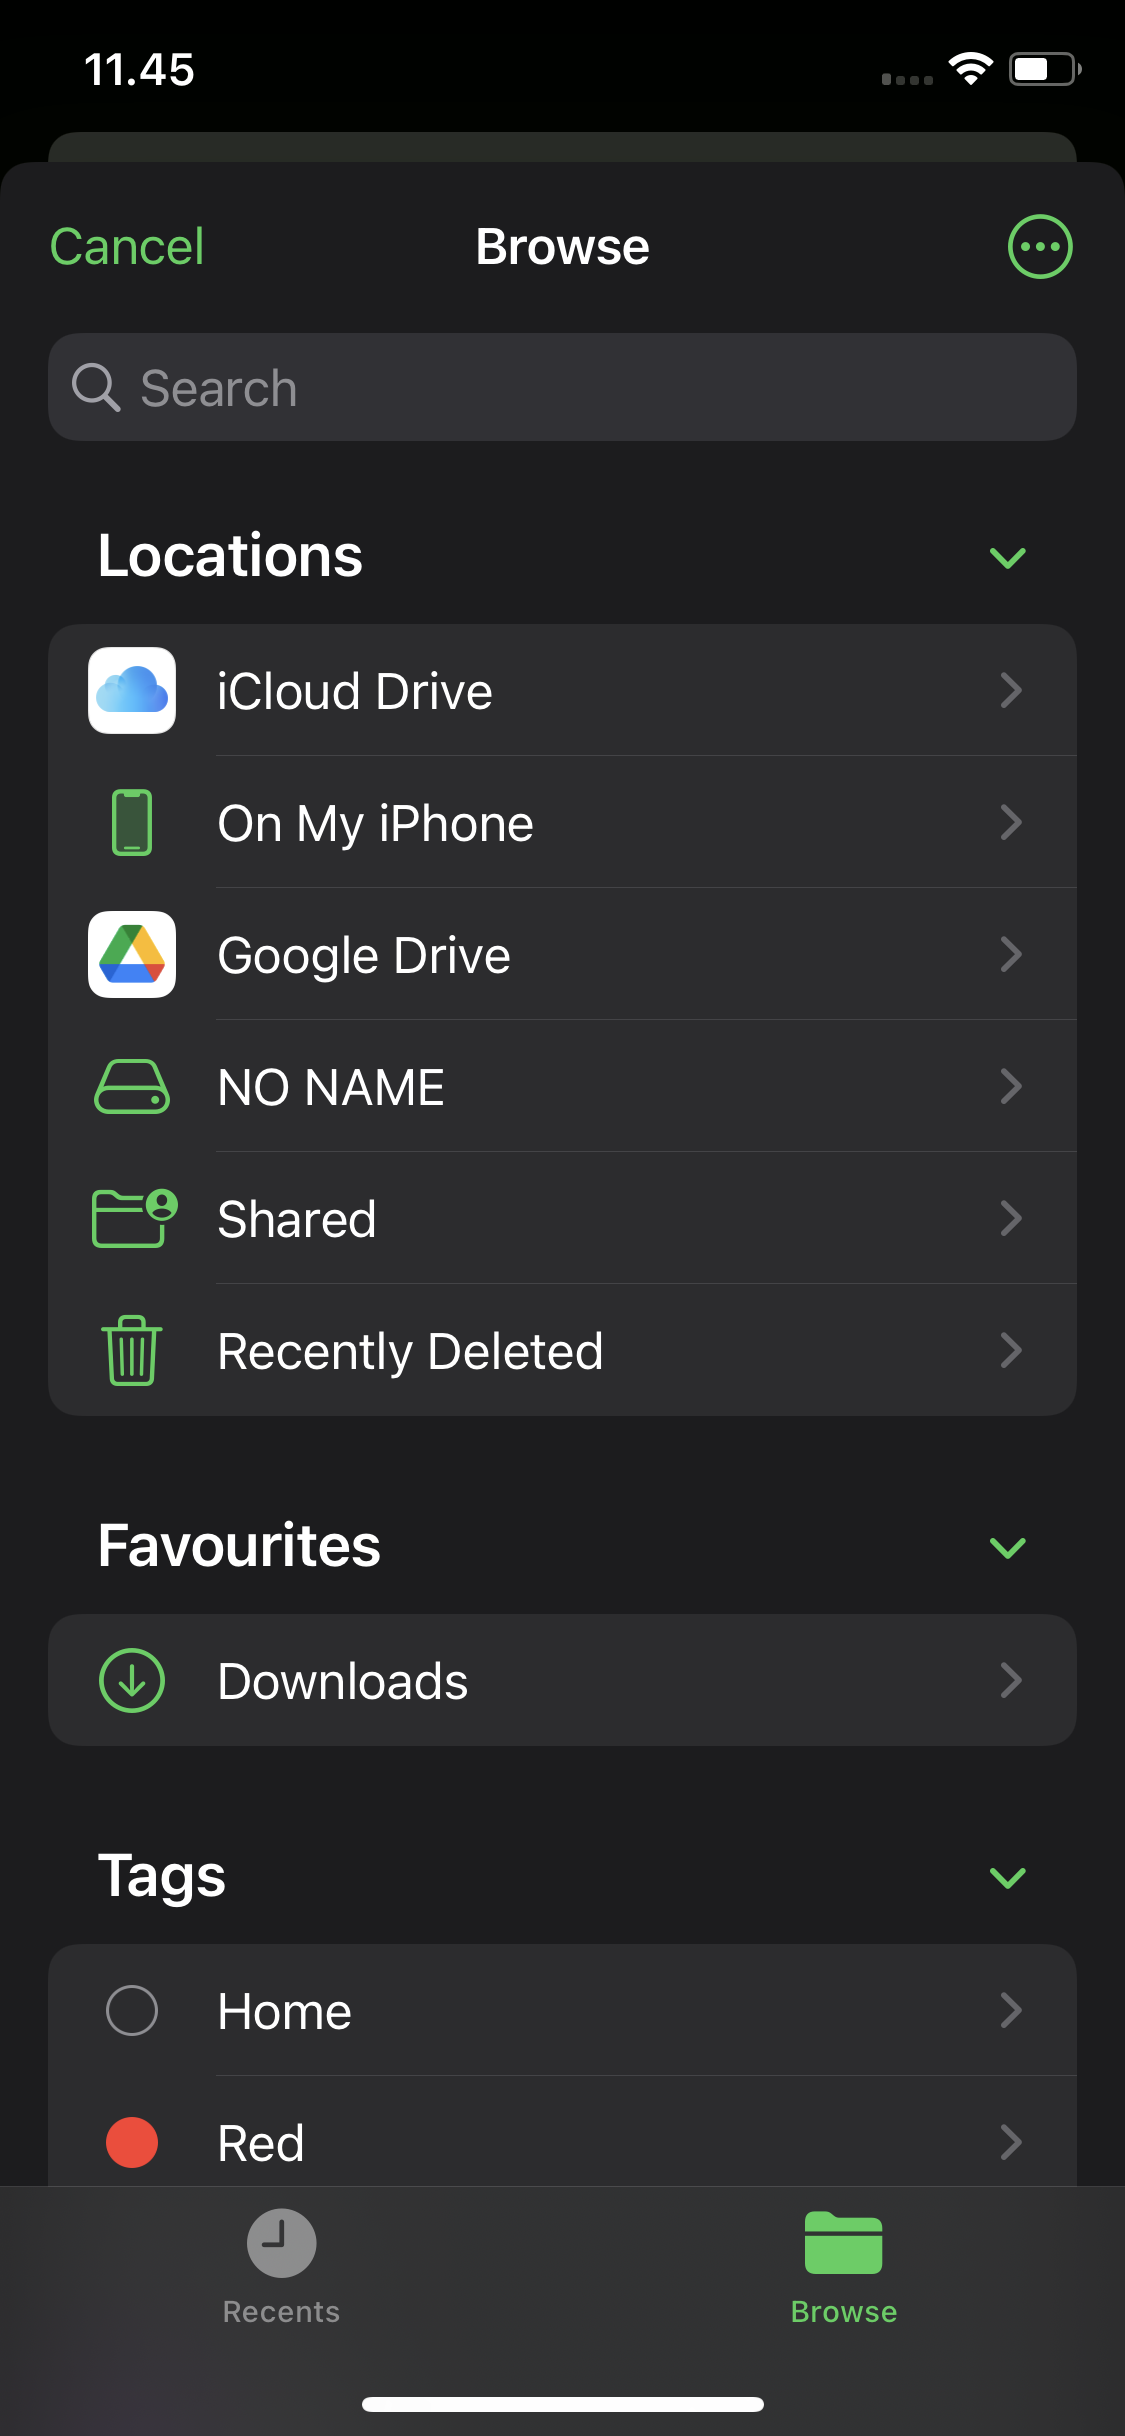
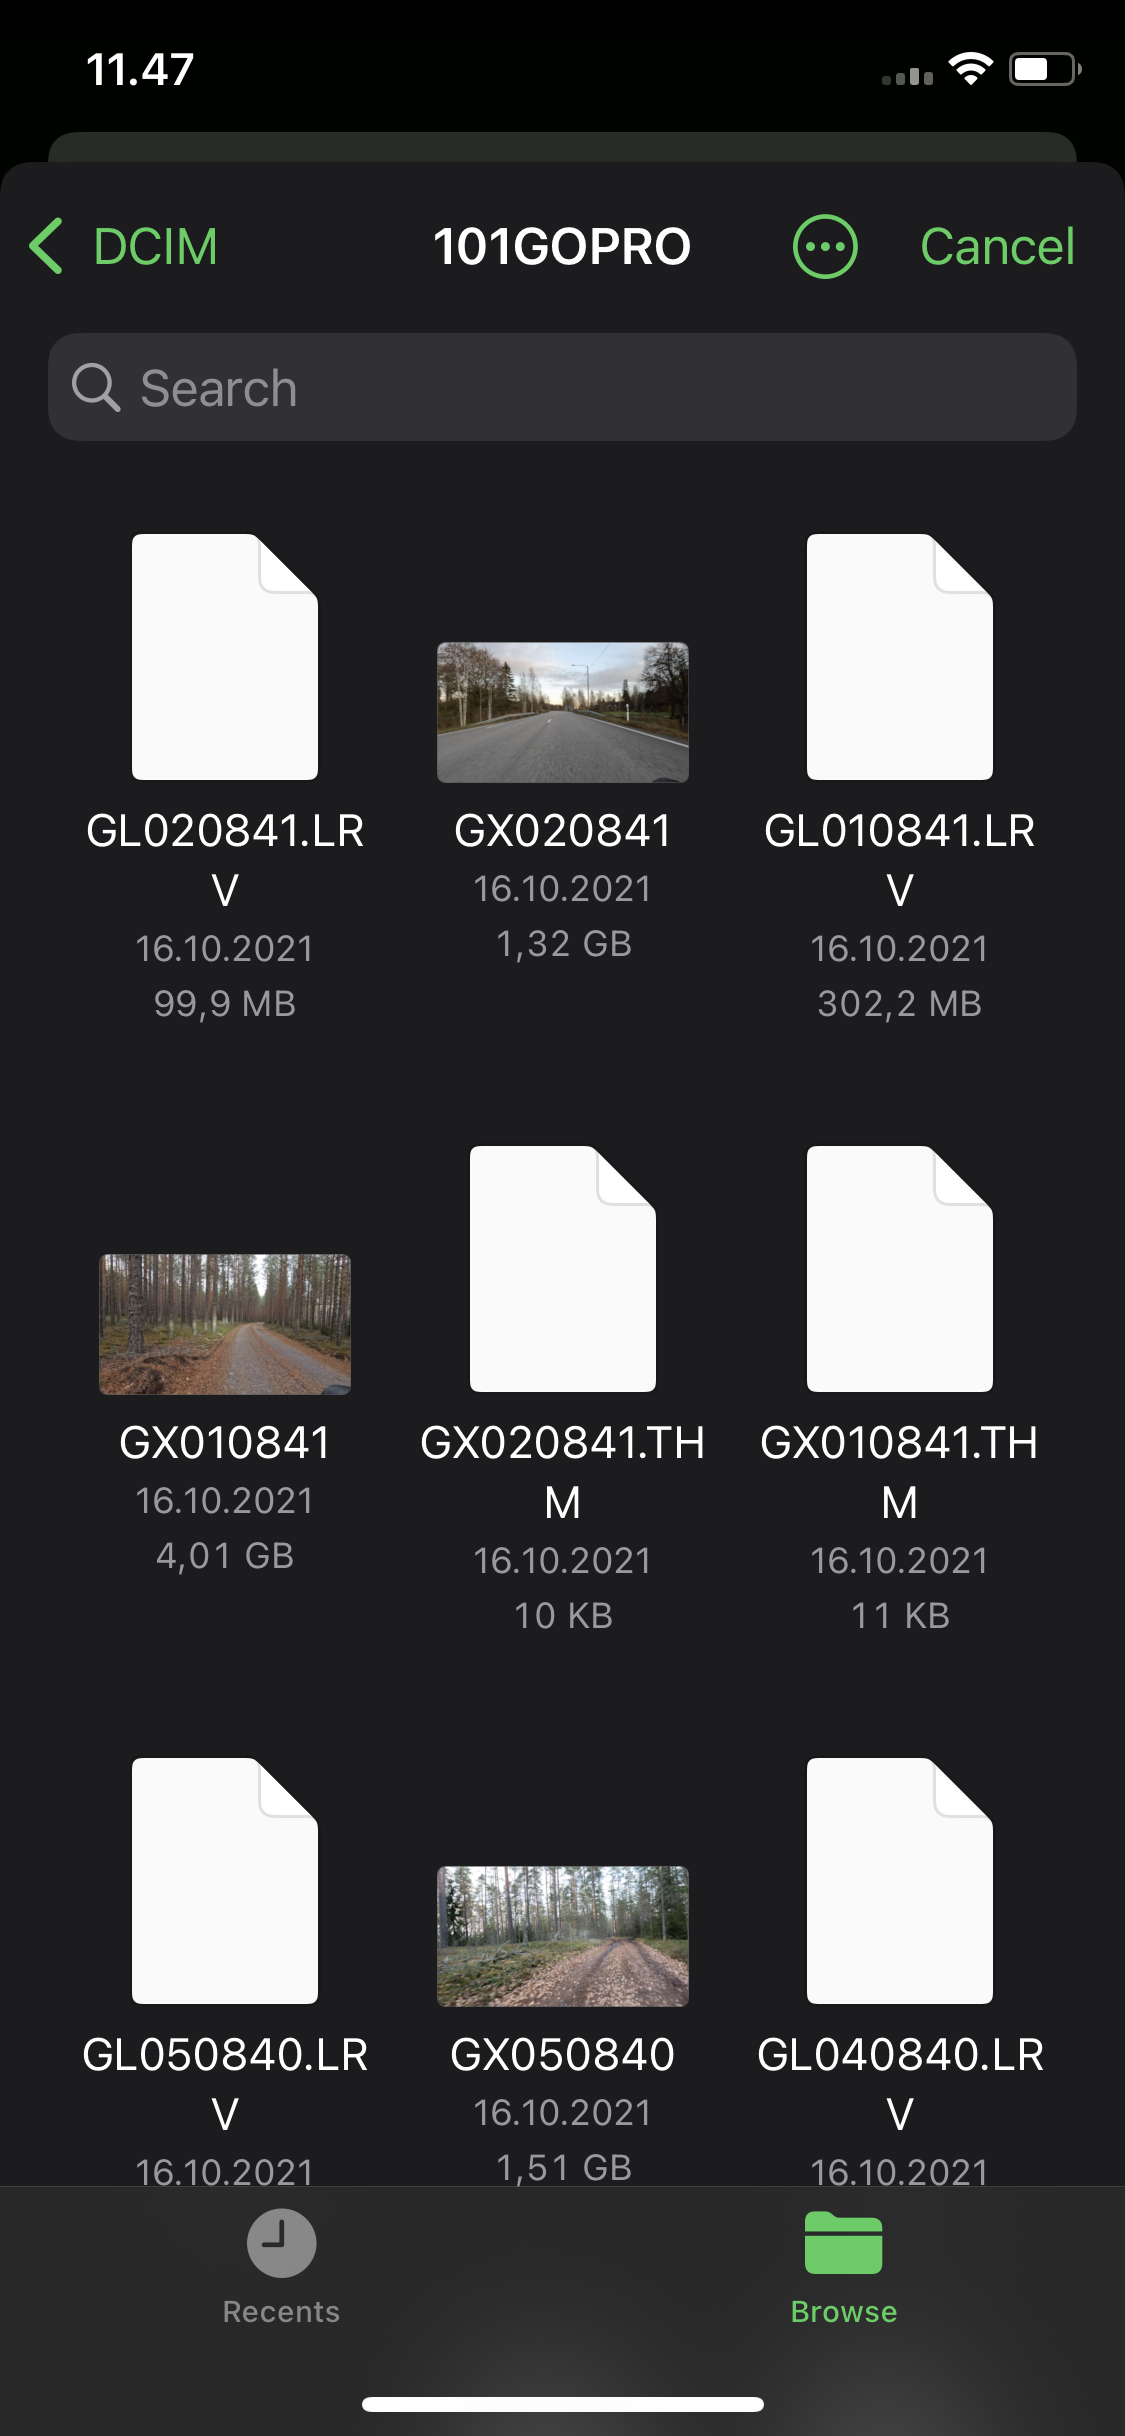
- Plug-in your memory card reader with the memory card already inserted. After a few seconds, the card will appear to the “Locations”. On the screenshot the “NO NAME” is the memory card. Open that and you will see the files on the card. If you’re deeper in to the directory structure, tap the back button until you see the main selections for the Files app.
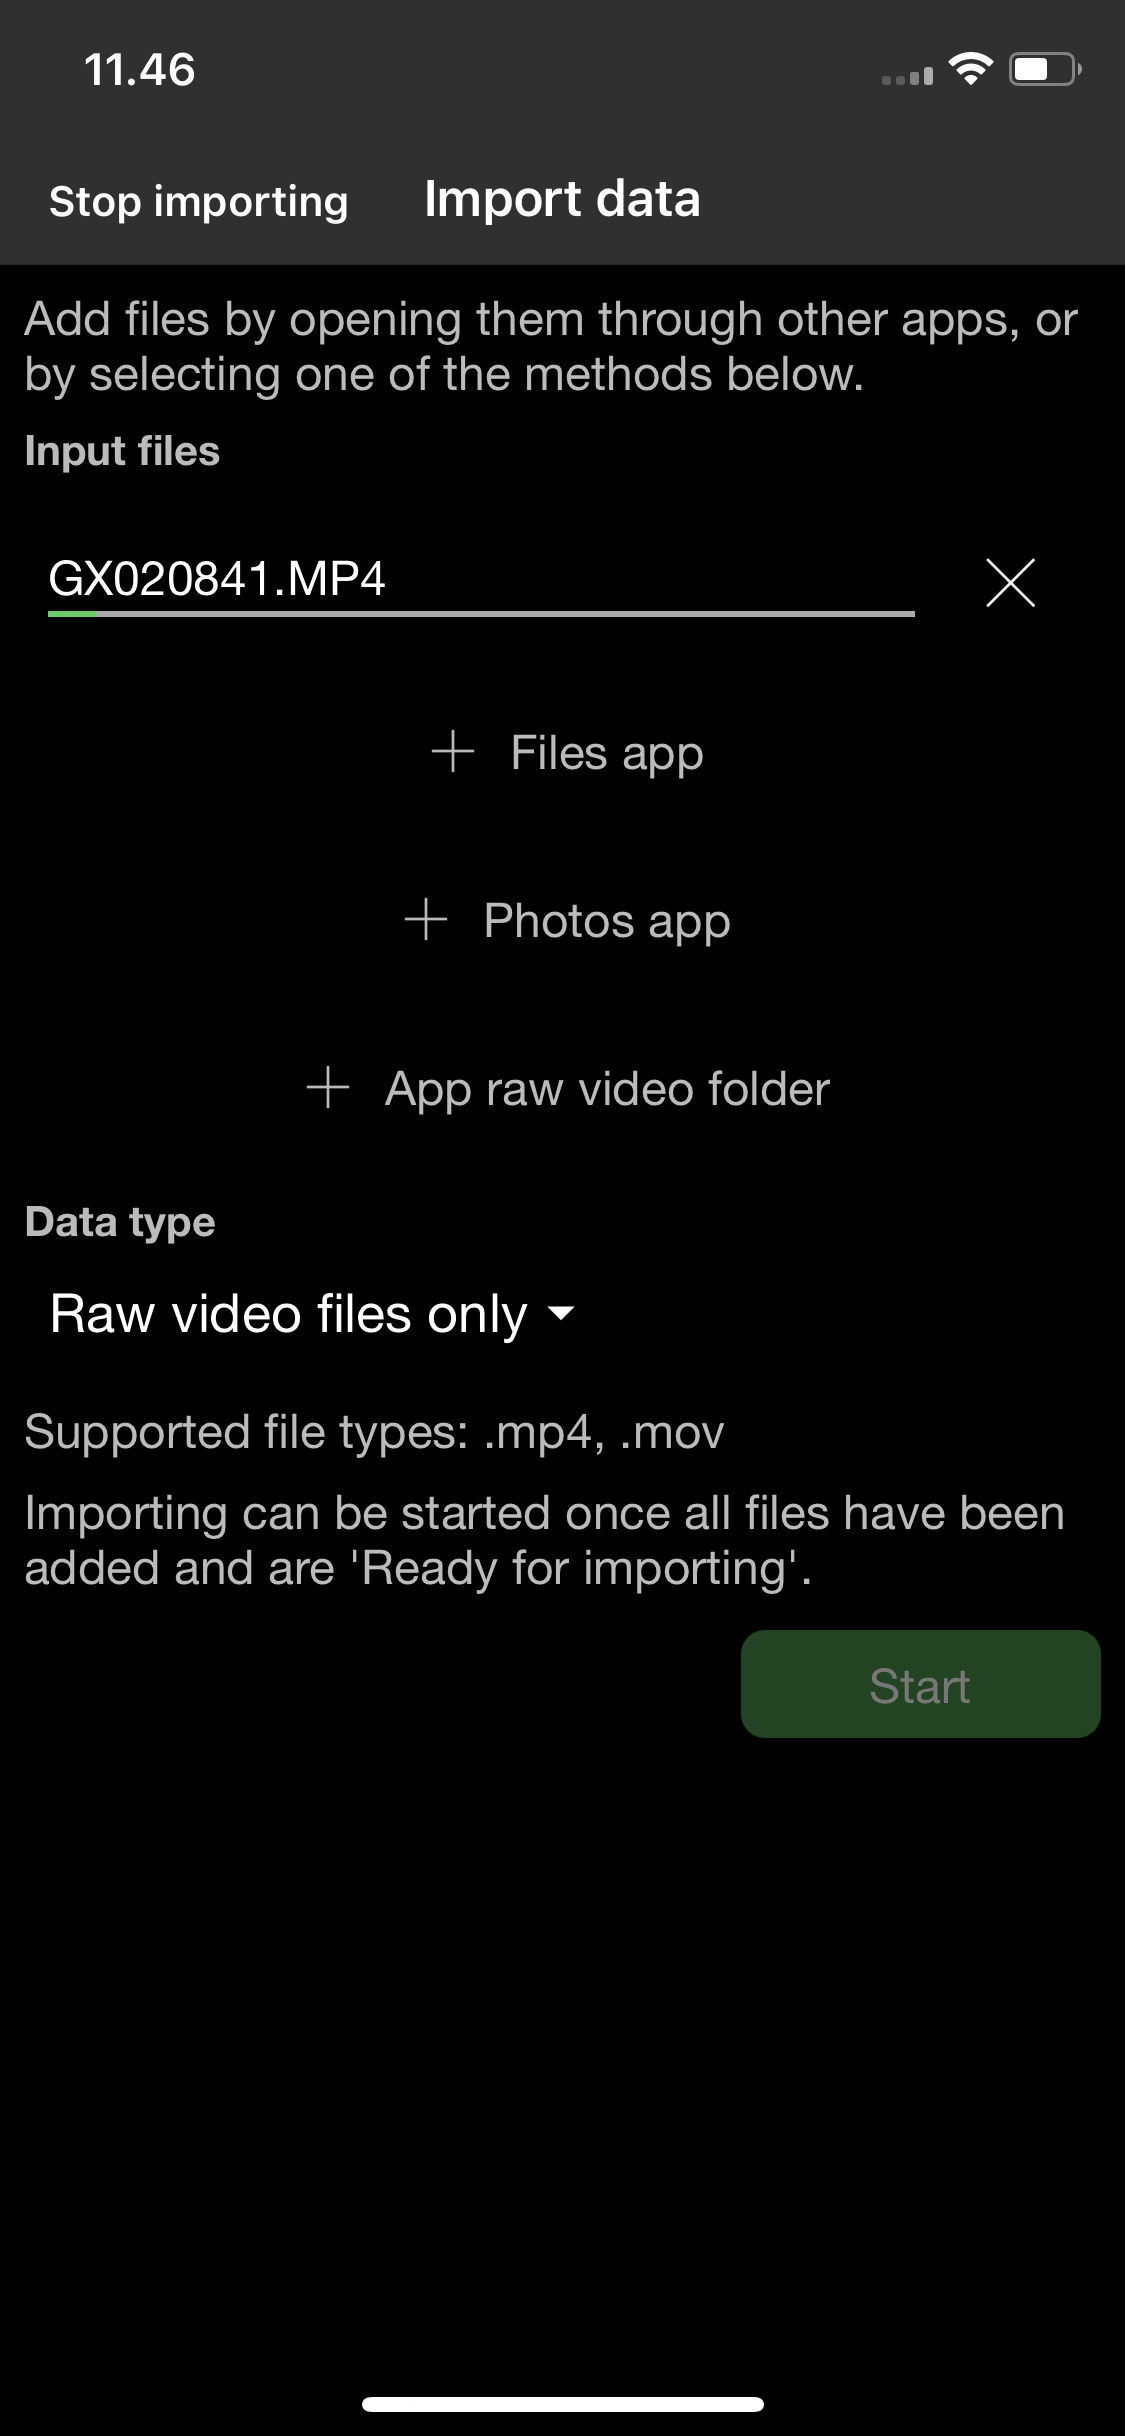
- Select the files you want, and you’ll see them on the Import screen. It will take a while copy the files from the memory card.
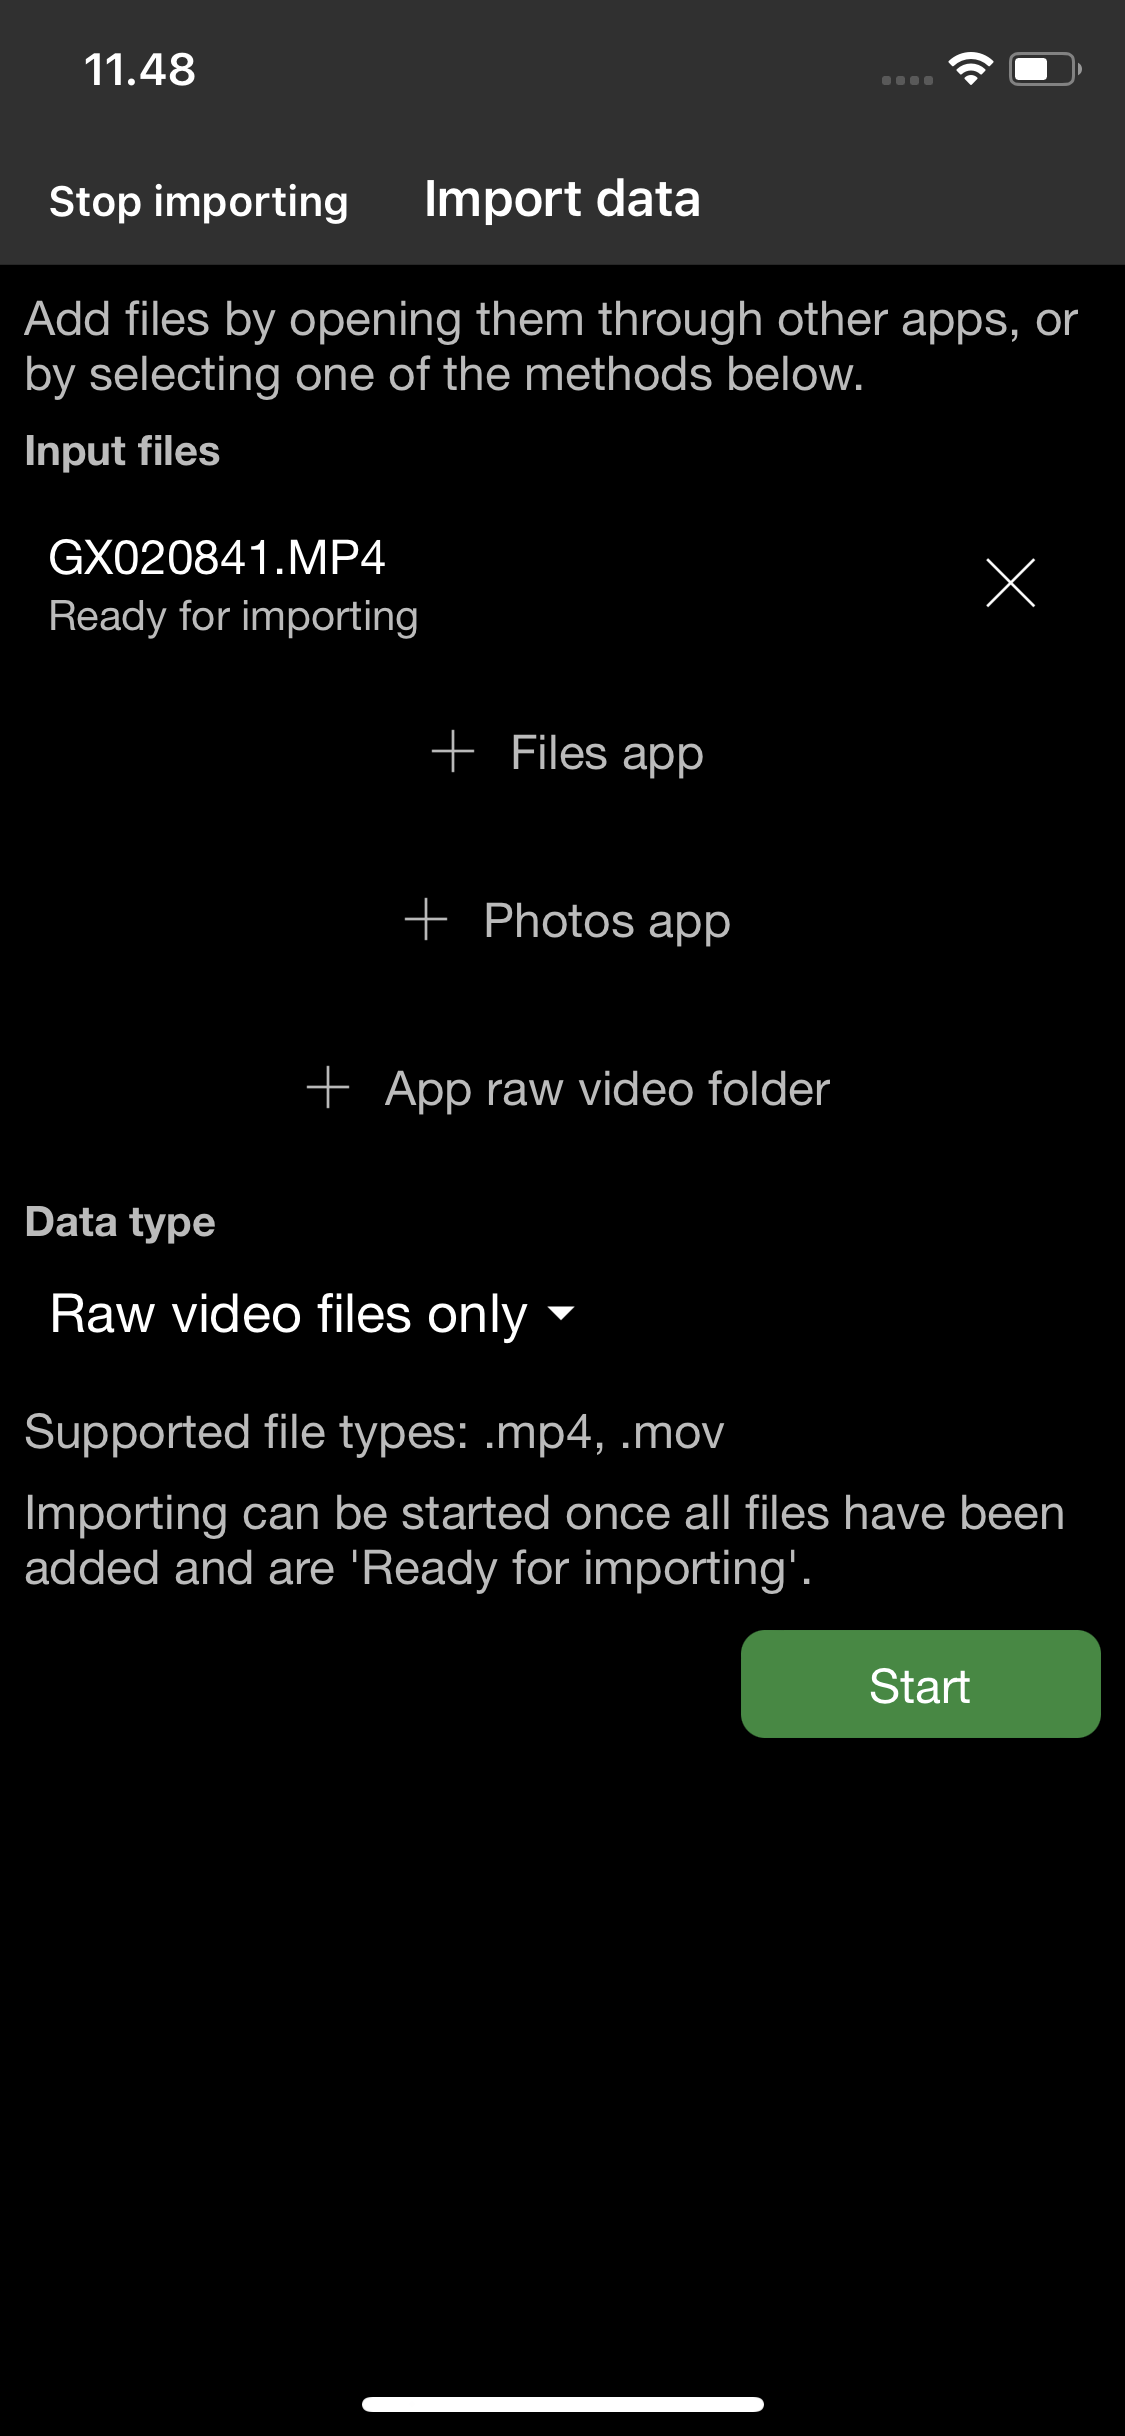
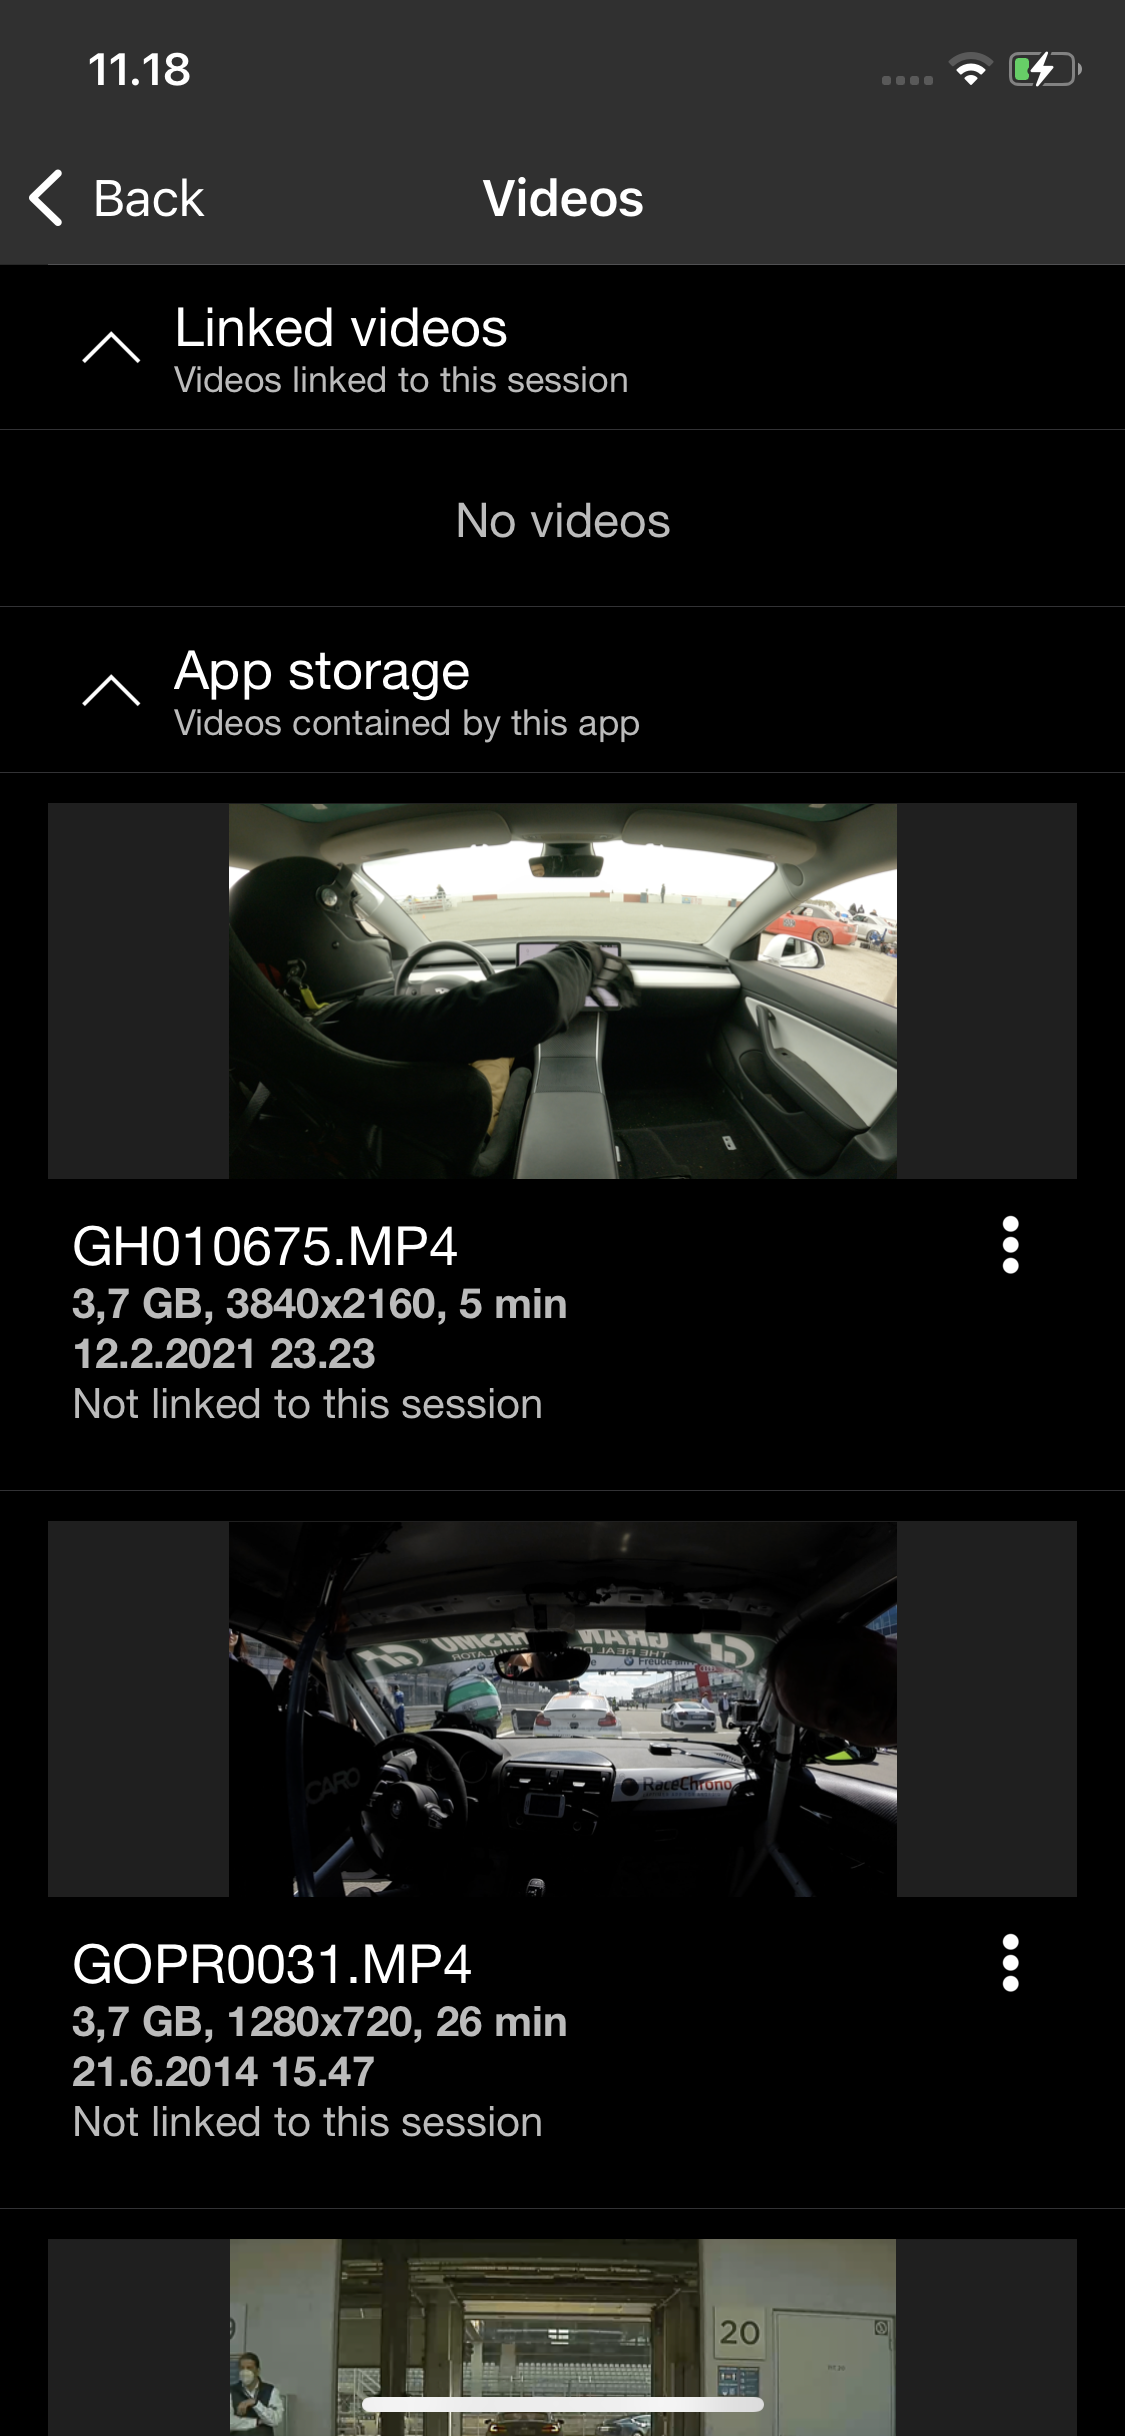
- After all files have finished copying, select “Raw video files only” as the data type, and press “Start” and the you’ll get a simple notification that the files have been copied to the raw videos folder. Go to your session’s video list, and you’ll see the copied files under the “App storage”. Now you’re ready to link and synchronise the video files to your session.
A2: Android: Importing files directly from a memory card
- Purchase a memory card reader that fits your phone.
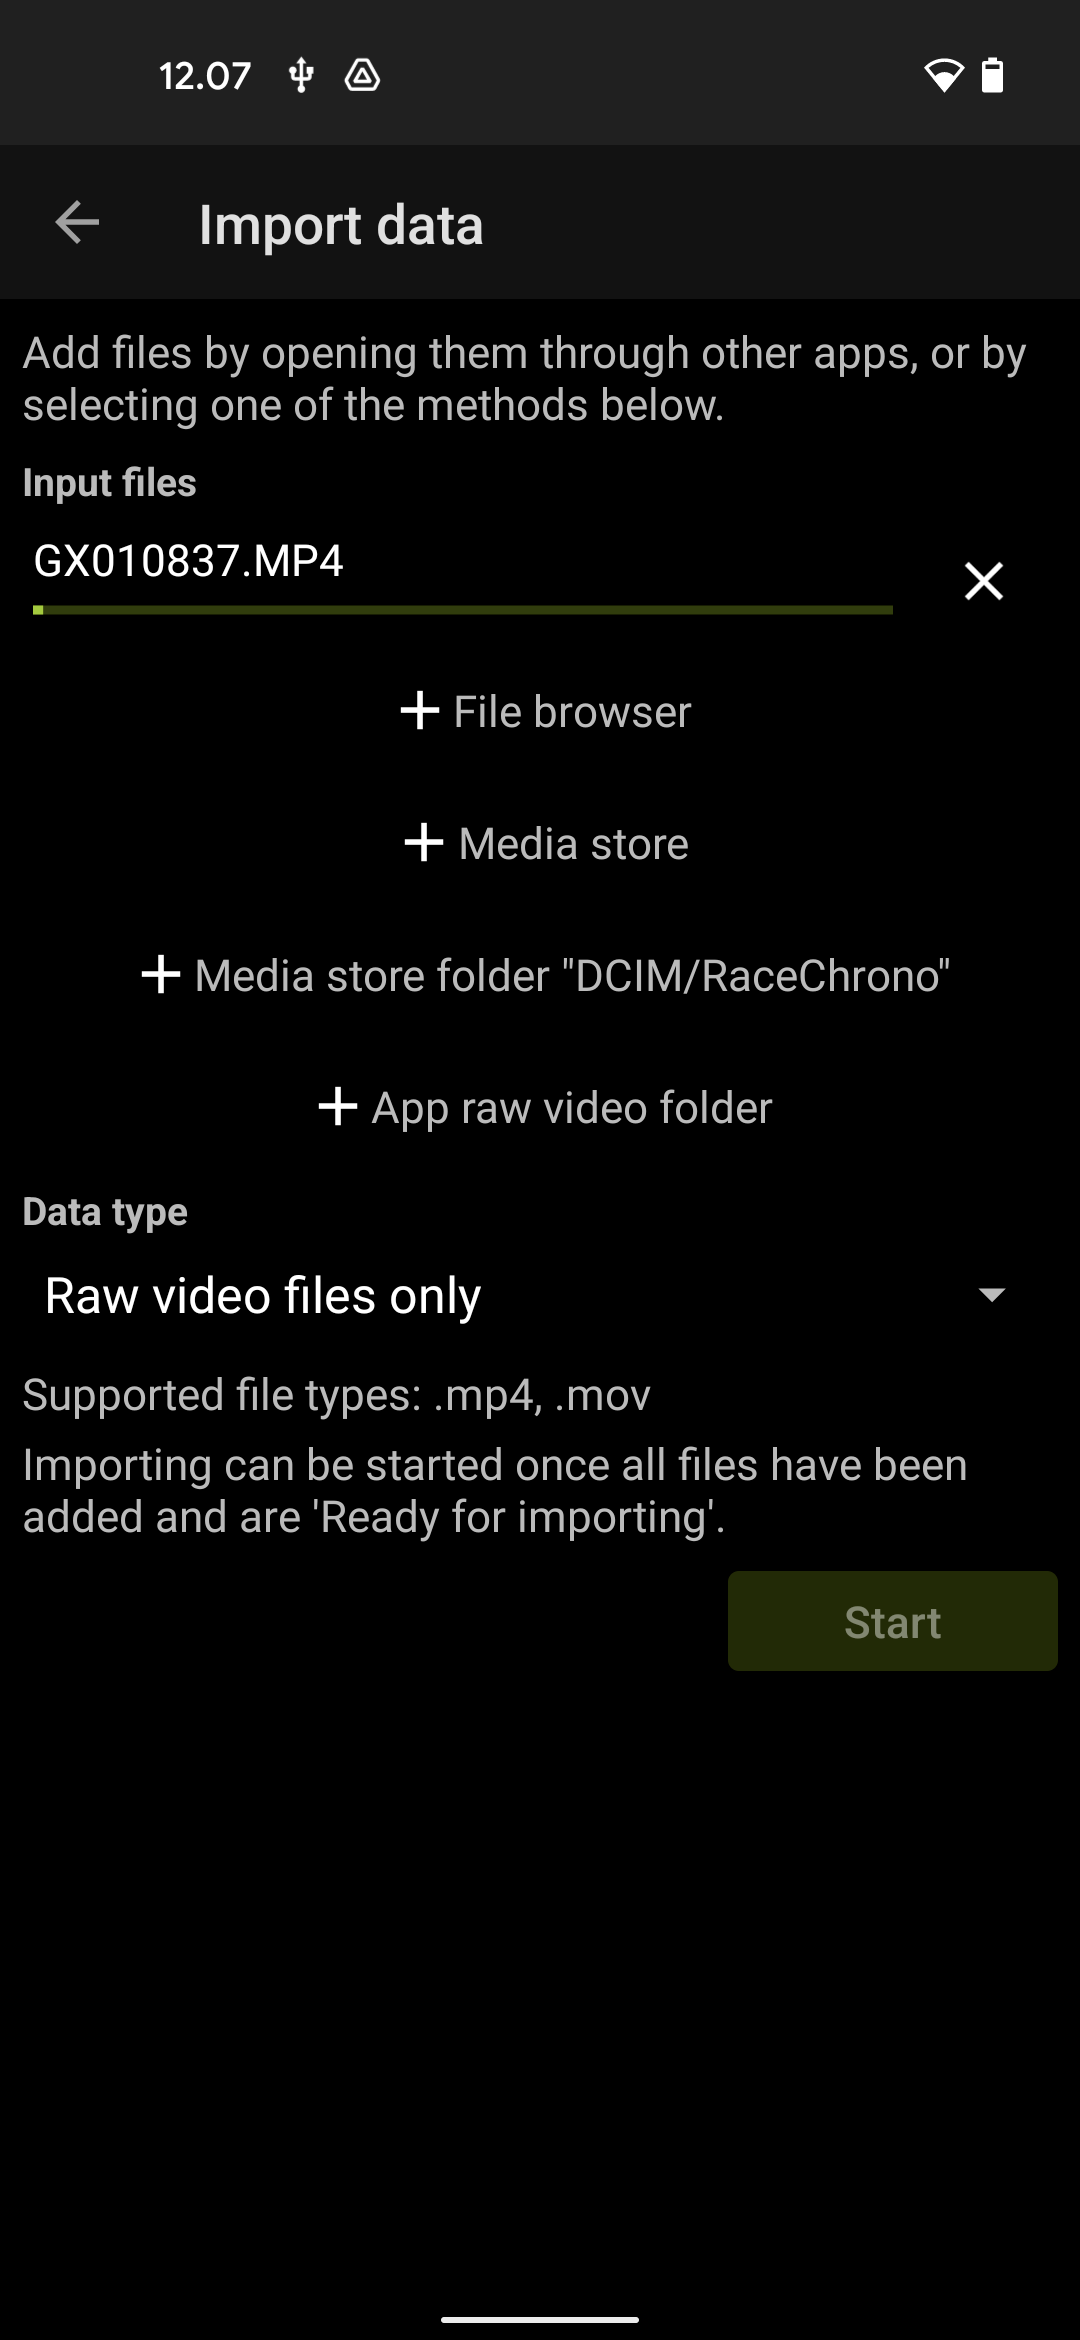
- Open the Import screen from the Main screen’s top menu. Select “Raw video files only” as the data type, and then select “+ File browser”.
- Open the file browser side menu, and plug-in your memory card reader with the memory card already inserted. After a few seconds, the card will appear to the menu. On the screenshot the “USB drive” is the memory card. Open that and you will see the files on the card. Notice 1: Depending on your phone brand and Android OS version, the usage might differ. Notice 2: Some phones will need the memory card to be originally formatted by the phone in order to mount it, but most do not.

- Select the files you want, and you’ll see them on the Import screen. It will take a while copy the files from the memory card.
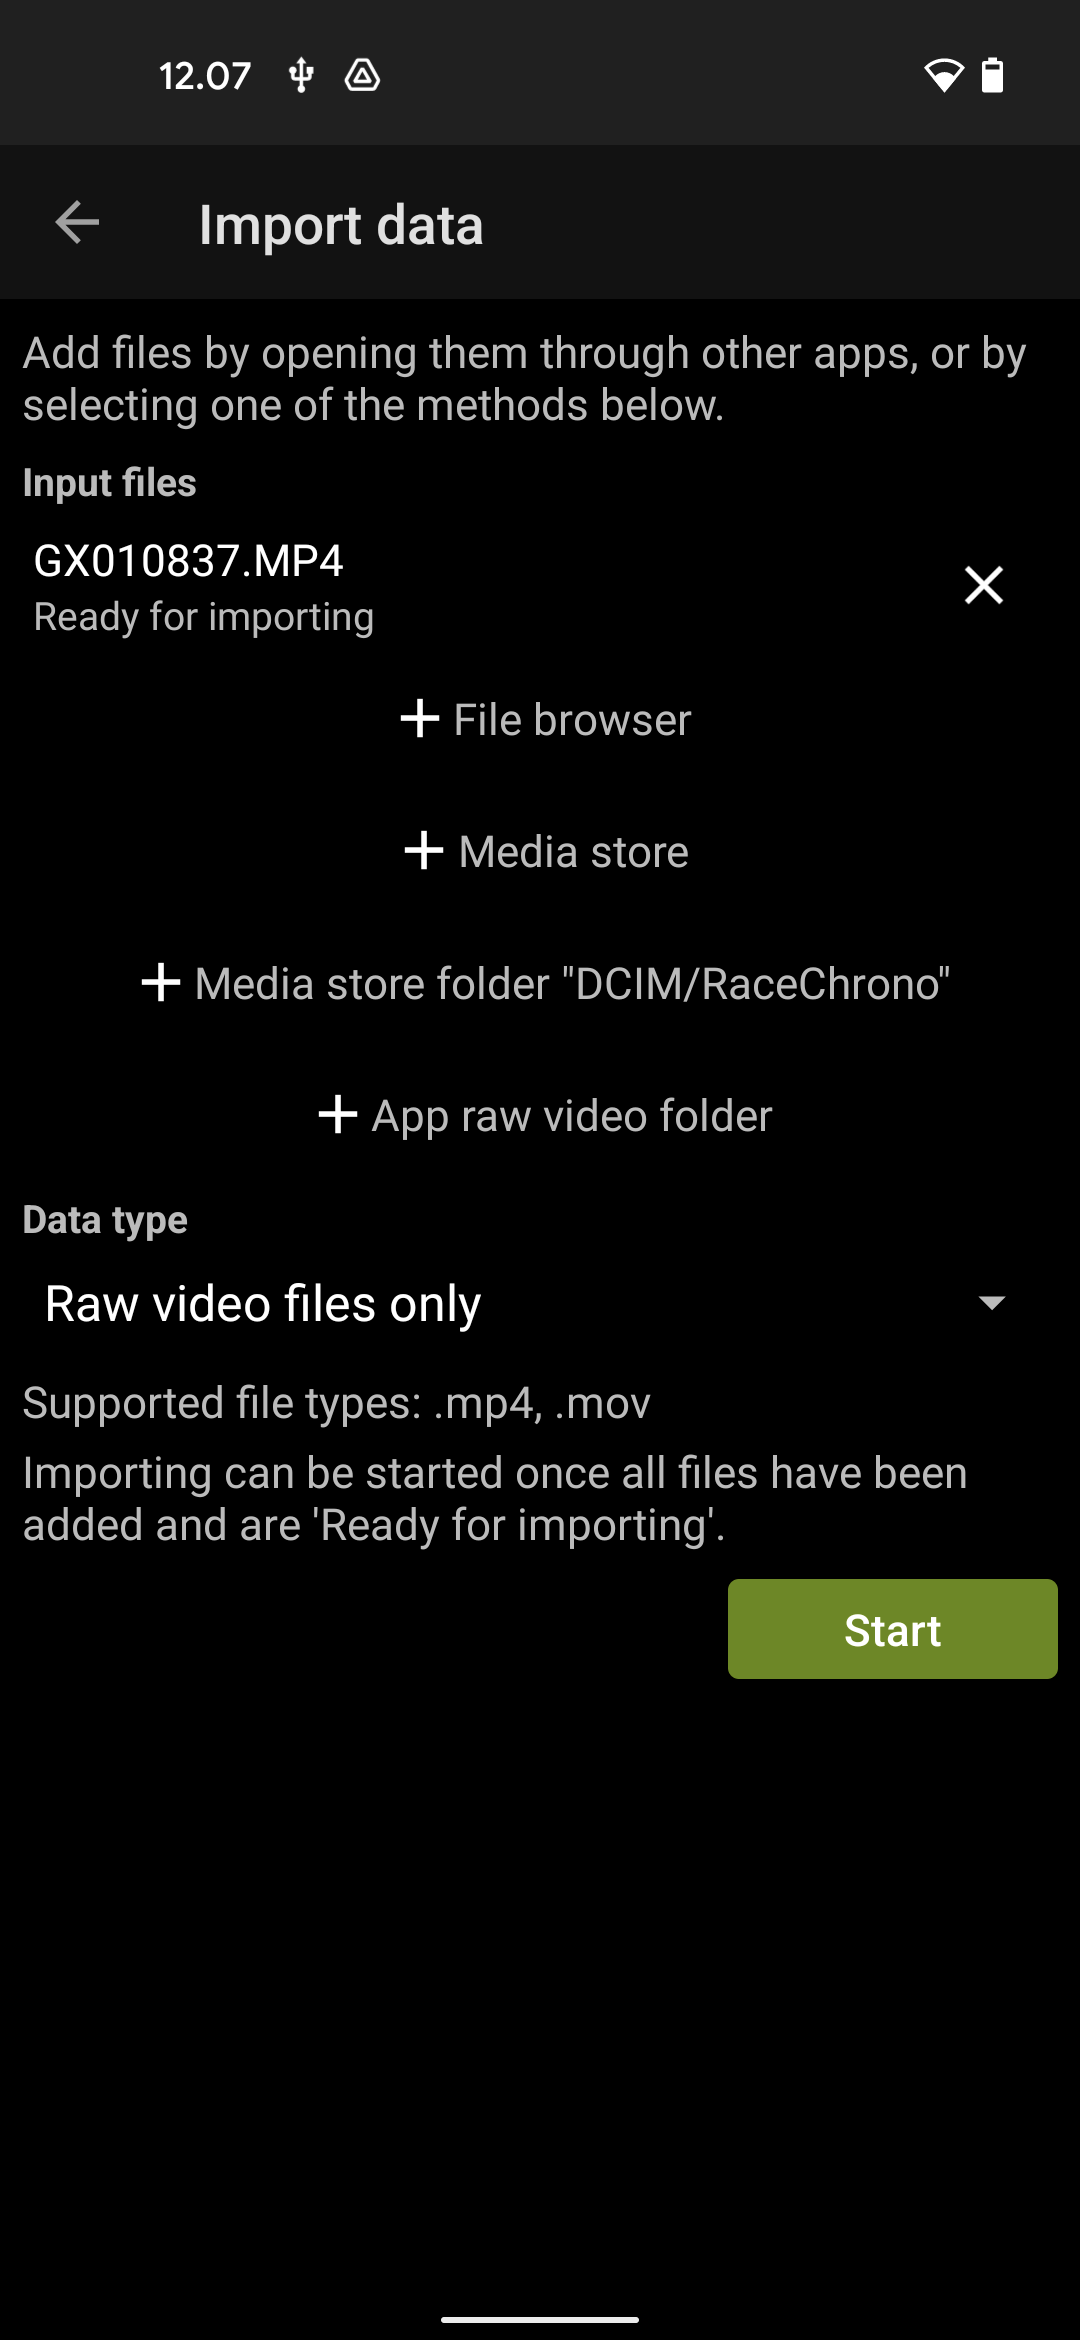
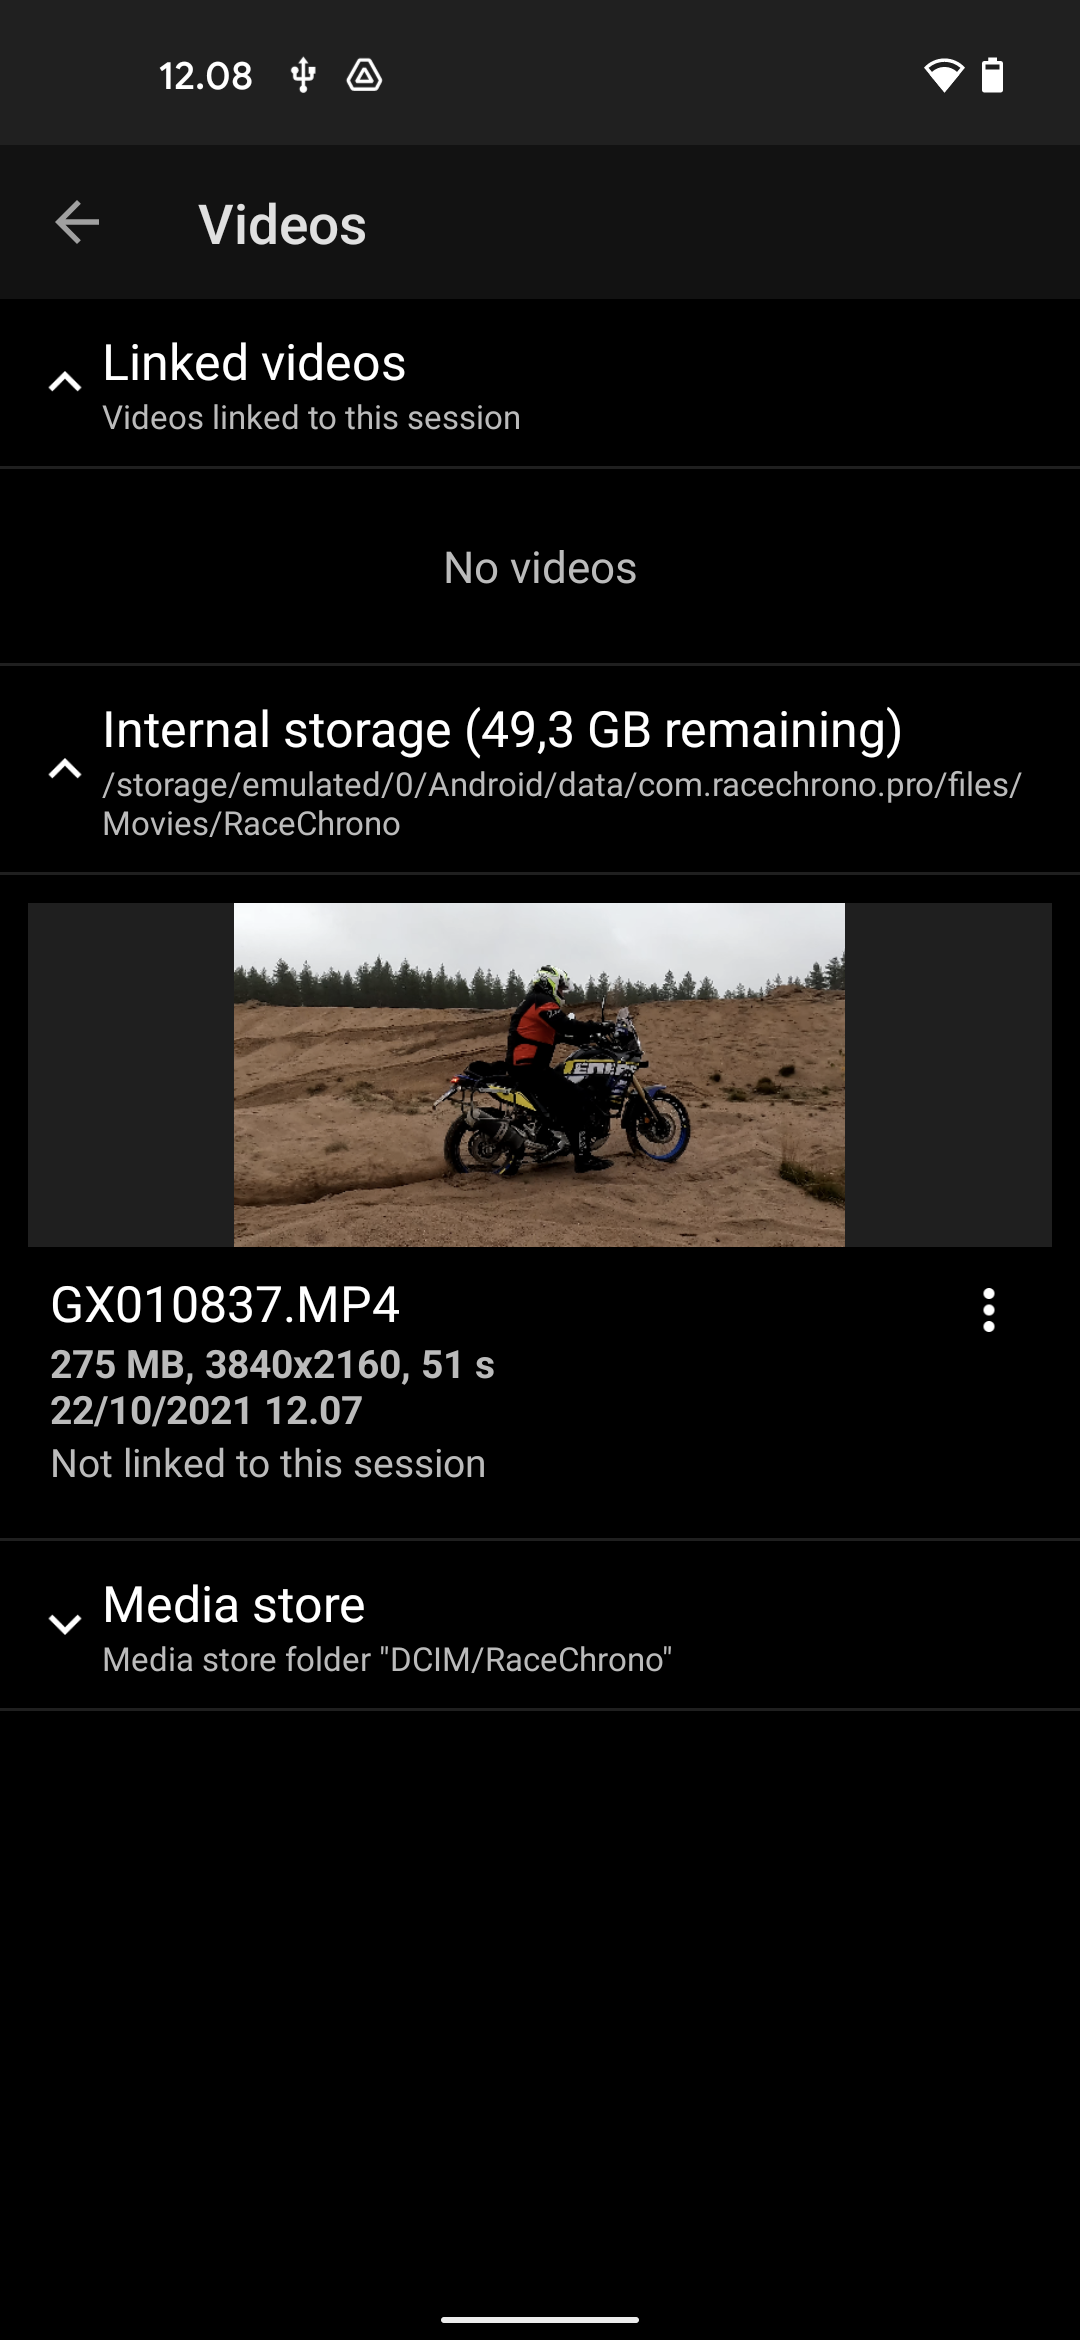
- After all files have finished copying, select “Raw video files only” as the data type, and press “Start” and the you’ll get a simple notification that the files have been copied to the raw videos folder. Go to your session’s video list, and you’ll see the copied files under the “Internal storage”. Now you’re ready to link and synchronise the video files to your session.
B1. iPad/iPhone: Importing video files uploaded to the iCloud Drive
Notice: While the Files app will allow you to download files from several cloud services, the iCloud will probably work the best. If you want to use Google Drive, please note the Files app is really unreliable for that. So you really want to try using the separate Google Drive app, and use the “Open in…” feature to send the file to RaceChrono.
- Open the Import screen from the Main screen’s top menu. Select “Raw video files only” as the data type, and then select “+ Files app”.
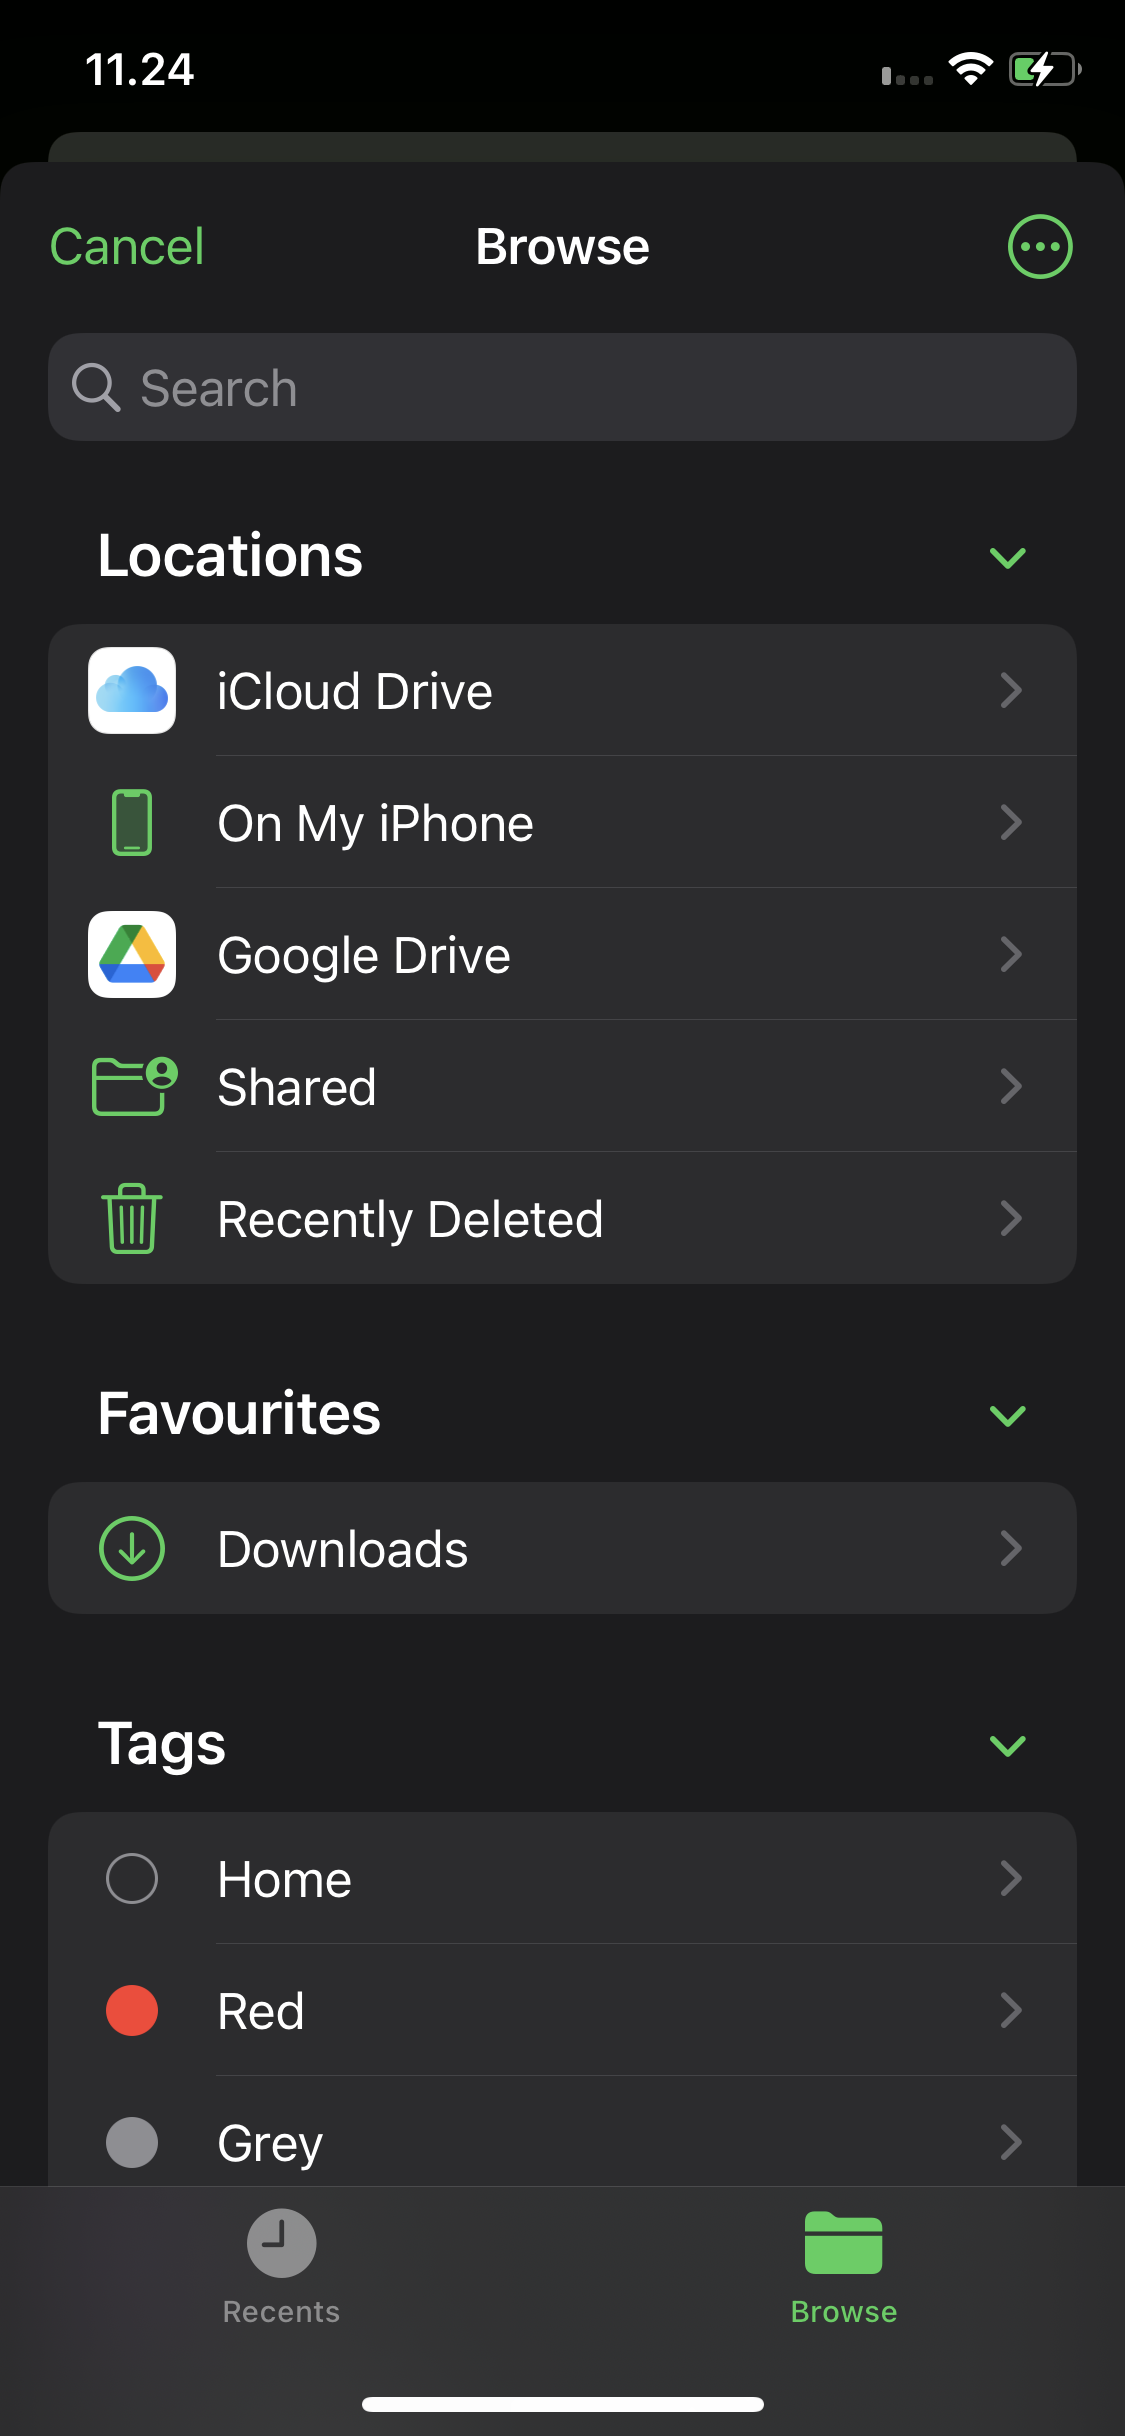
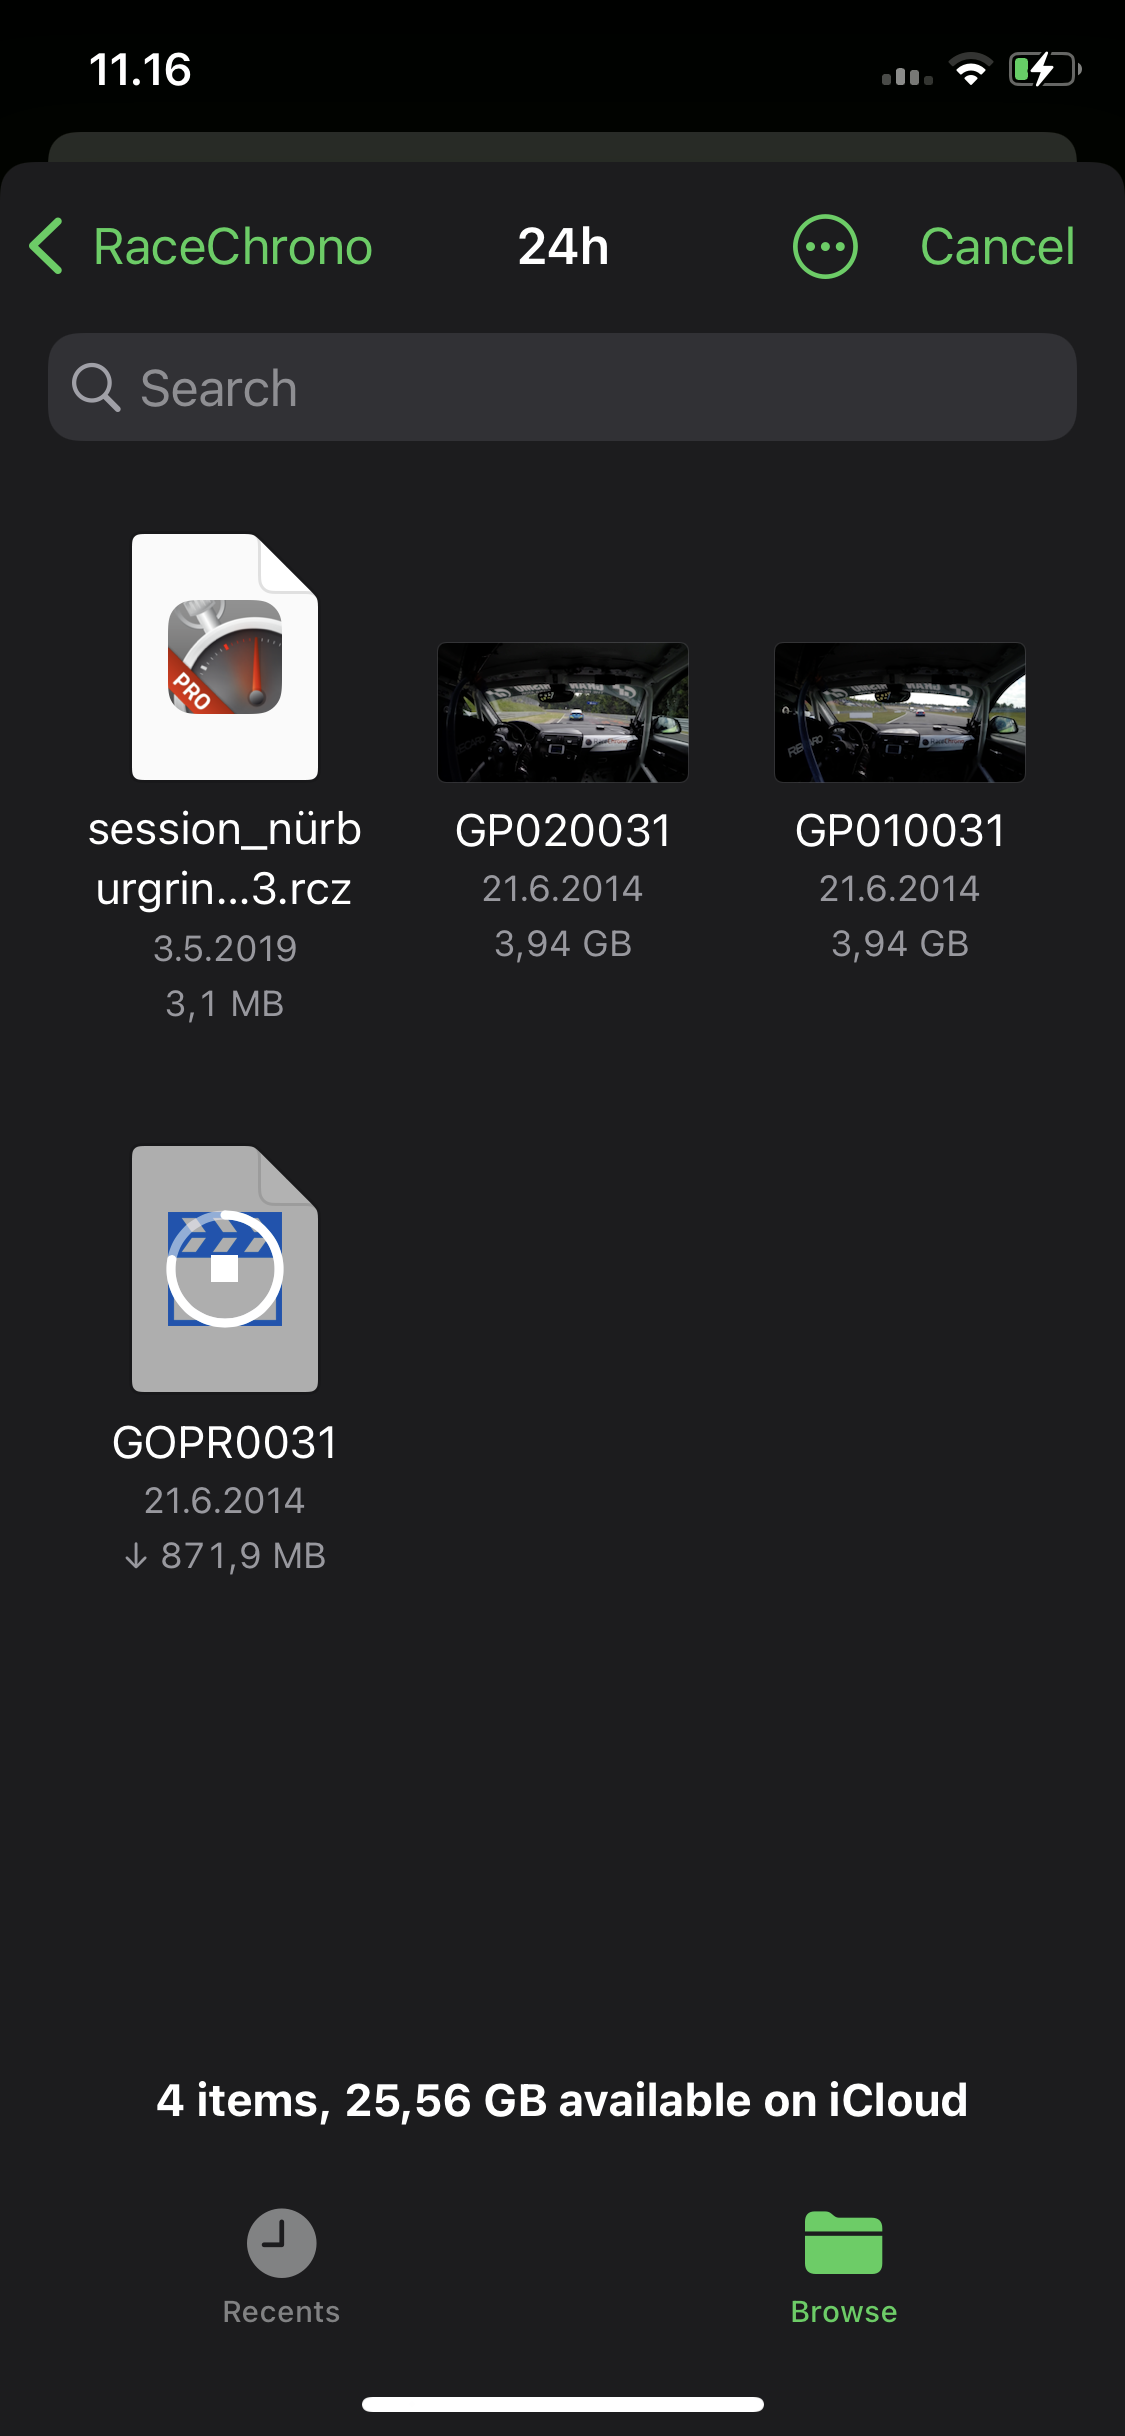
- Select “ICloud Drive” and you can import your files. If you’re deeper in to the directory structure, tap the back button until you see the main selections for the Files app. Now download and select your files, and they will appear on the Import screen.
- After all files have finished copying, select “Raw video files only” as the data type, press “Start” and the you’ll get a simple notification that the files have been copied to the raw videos folder. Go to your session’s video list, and you’ll see the copied files under the “App storage”. Now you’re ready to link and synchronise the video files to your session.
B1. Android: Importing video files uploaded to the Google Drive
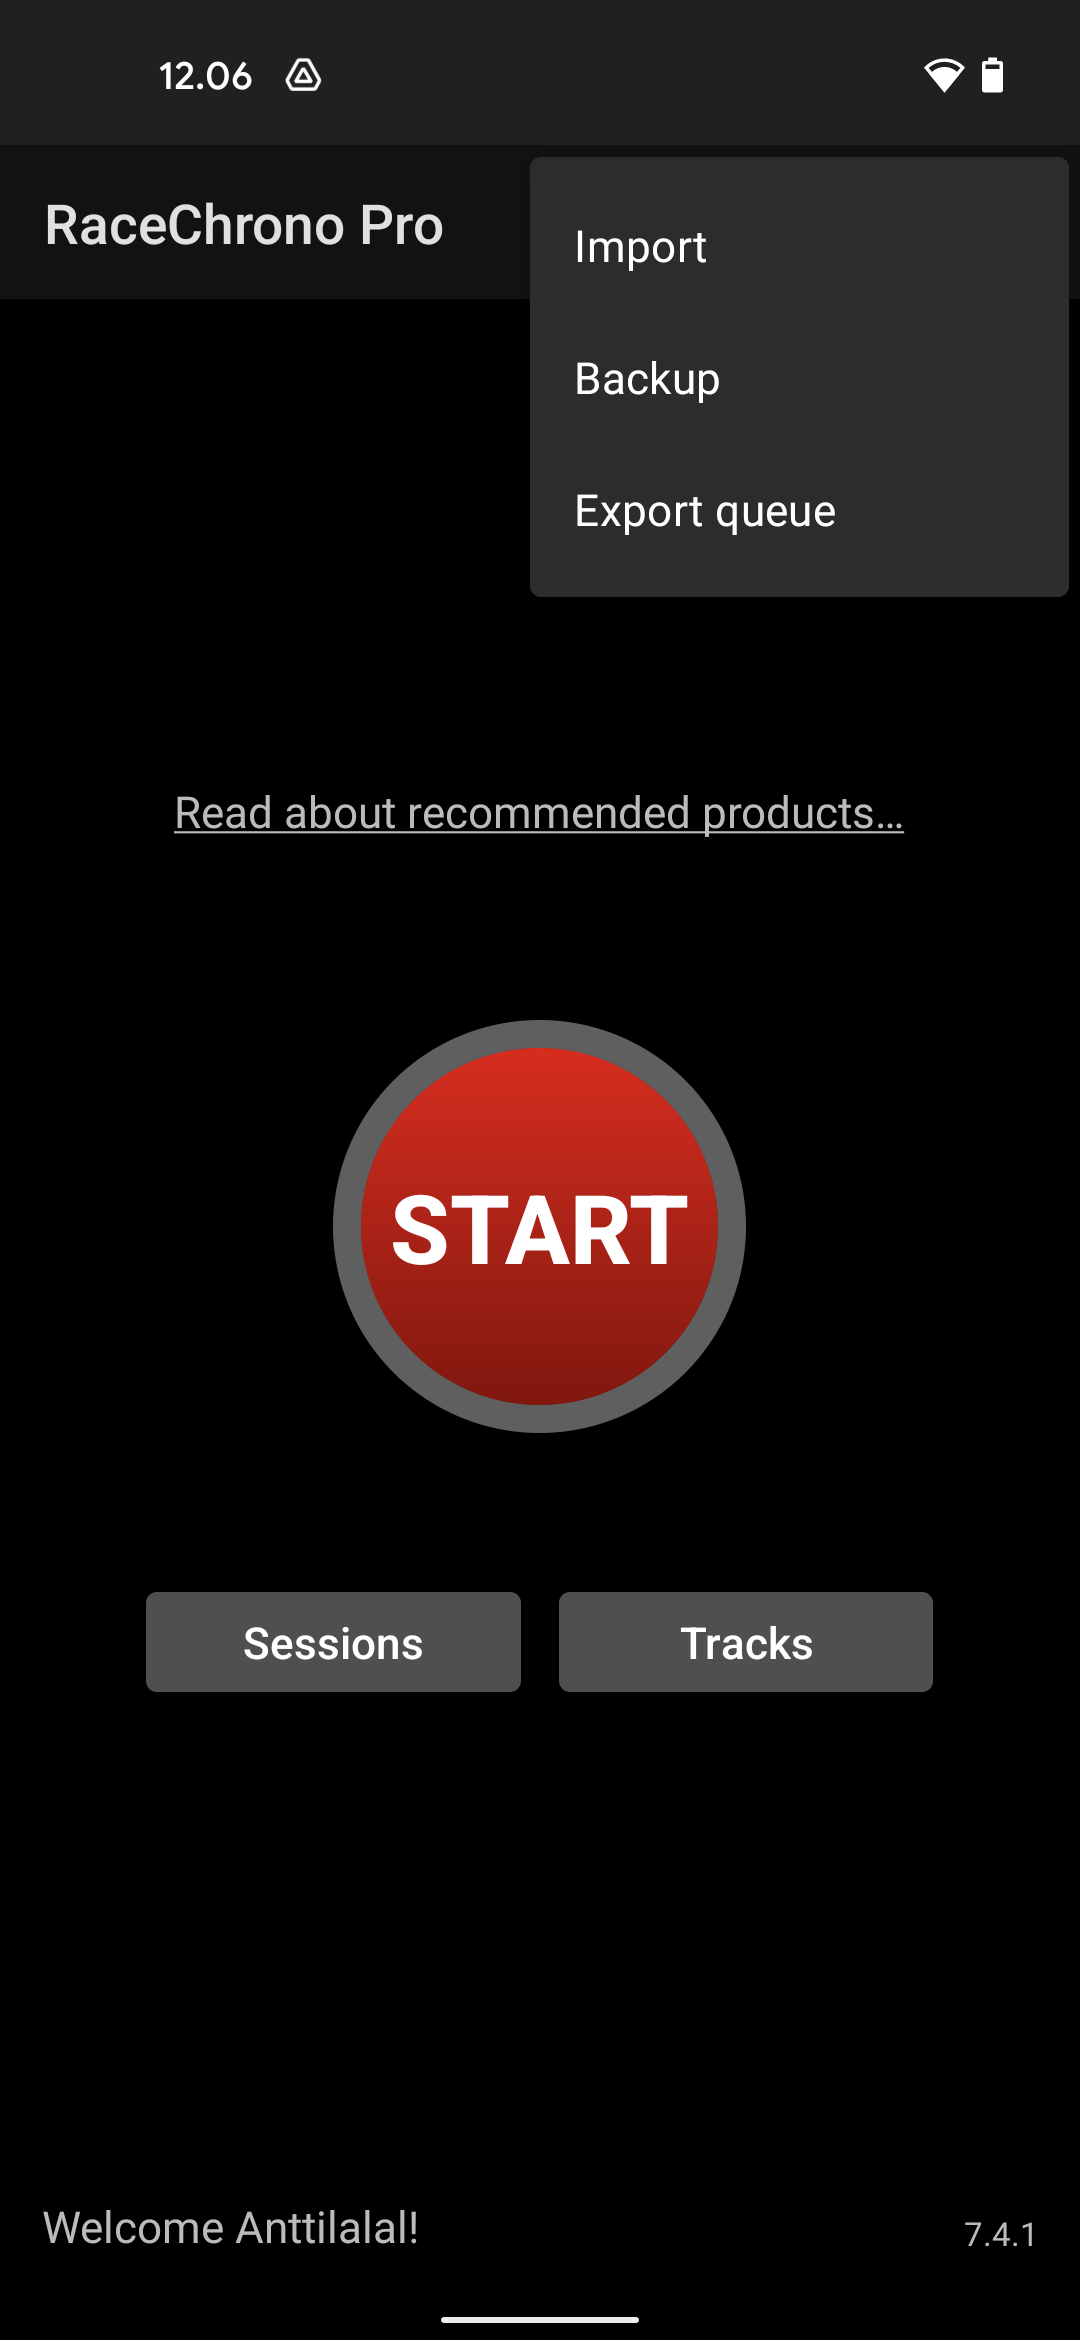
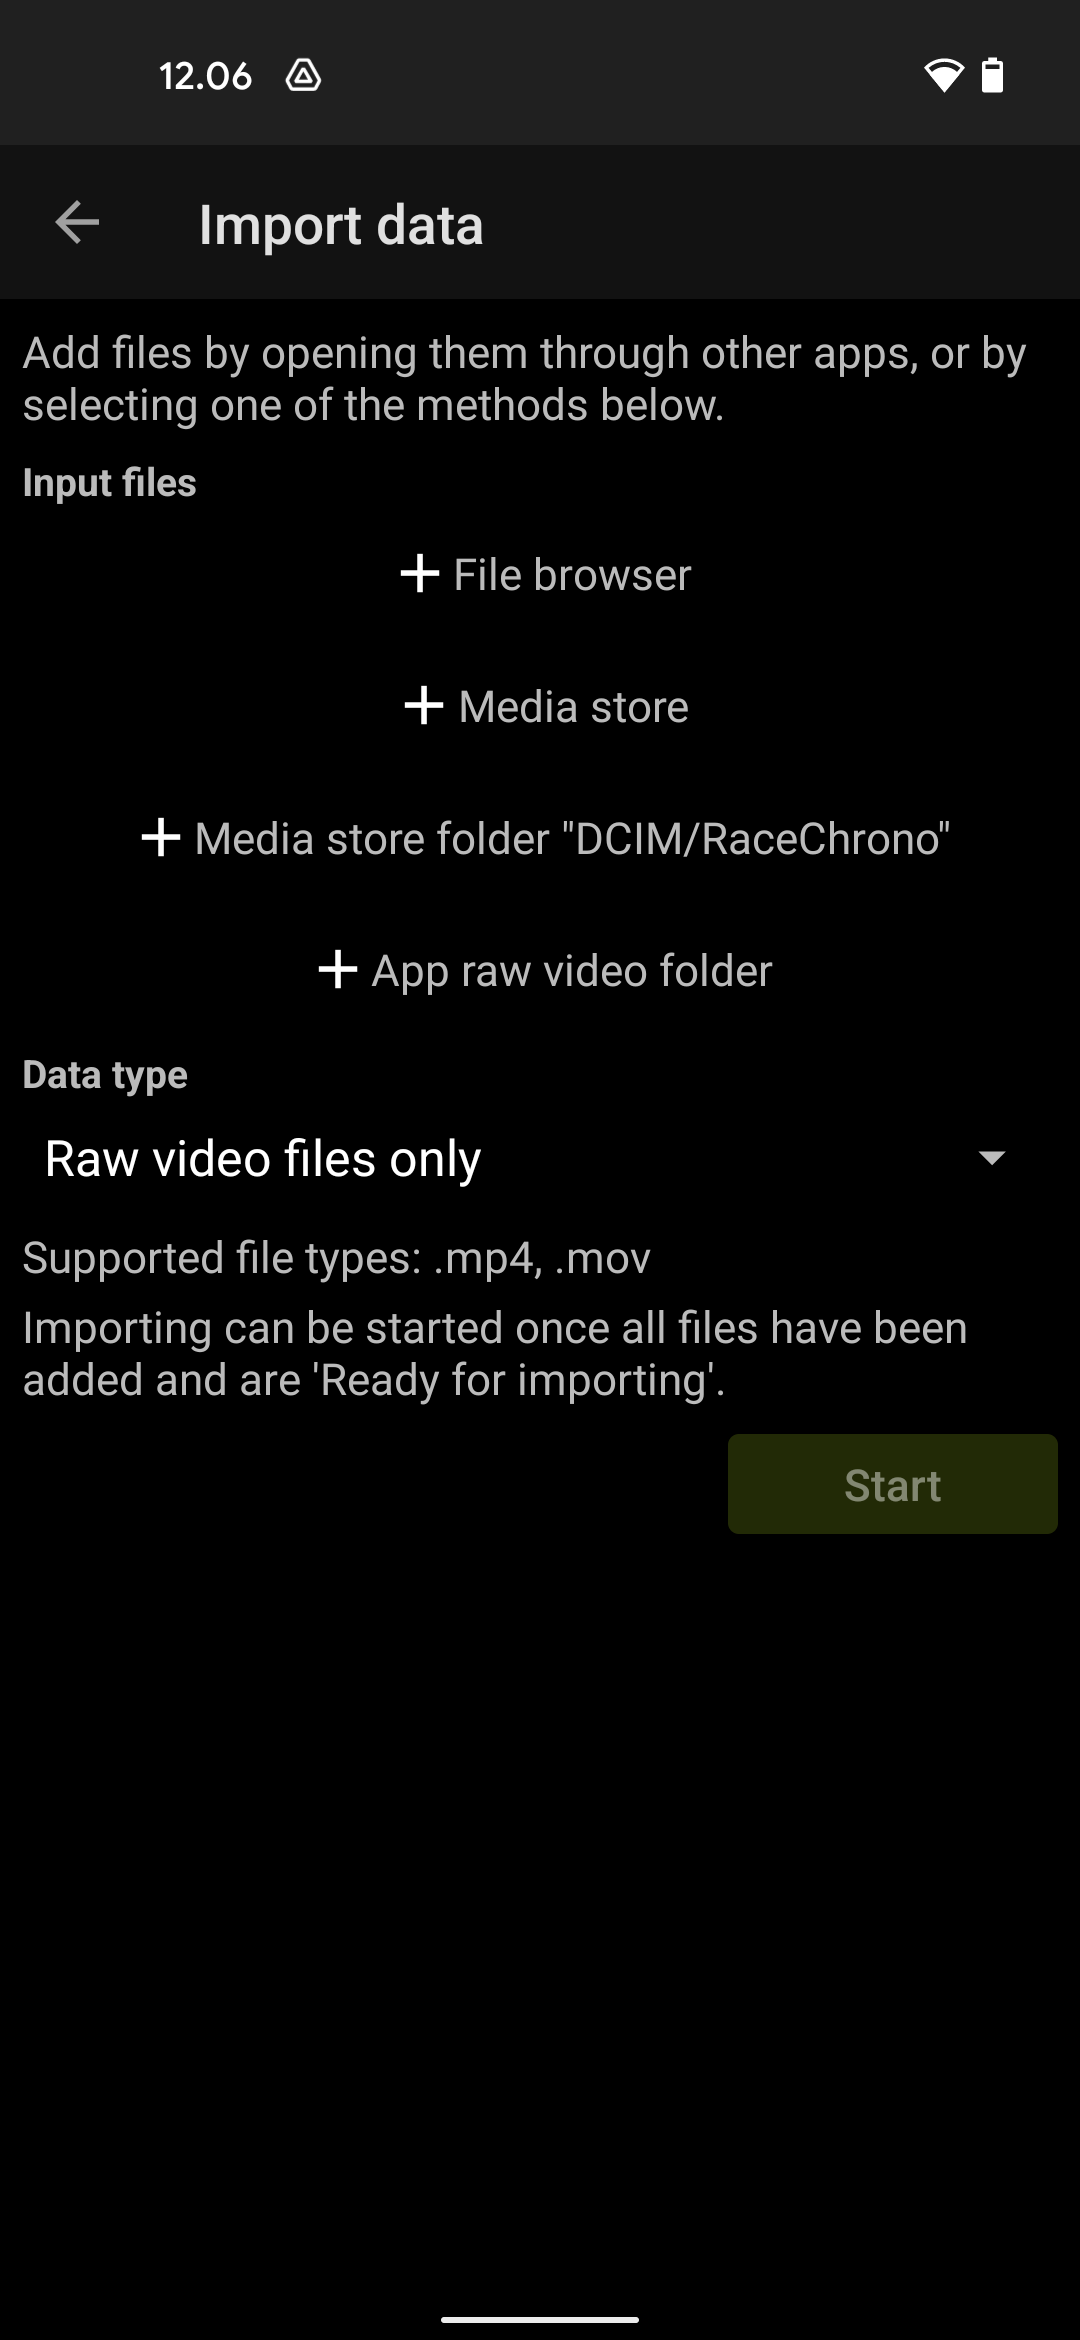
- Open the Import screen from the Main screen’s top menu. Select “Raw video files only” as the data type, and then select “+ File browser”.
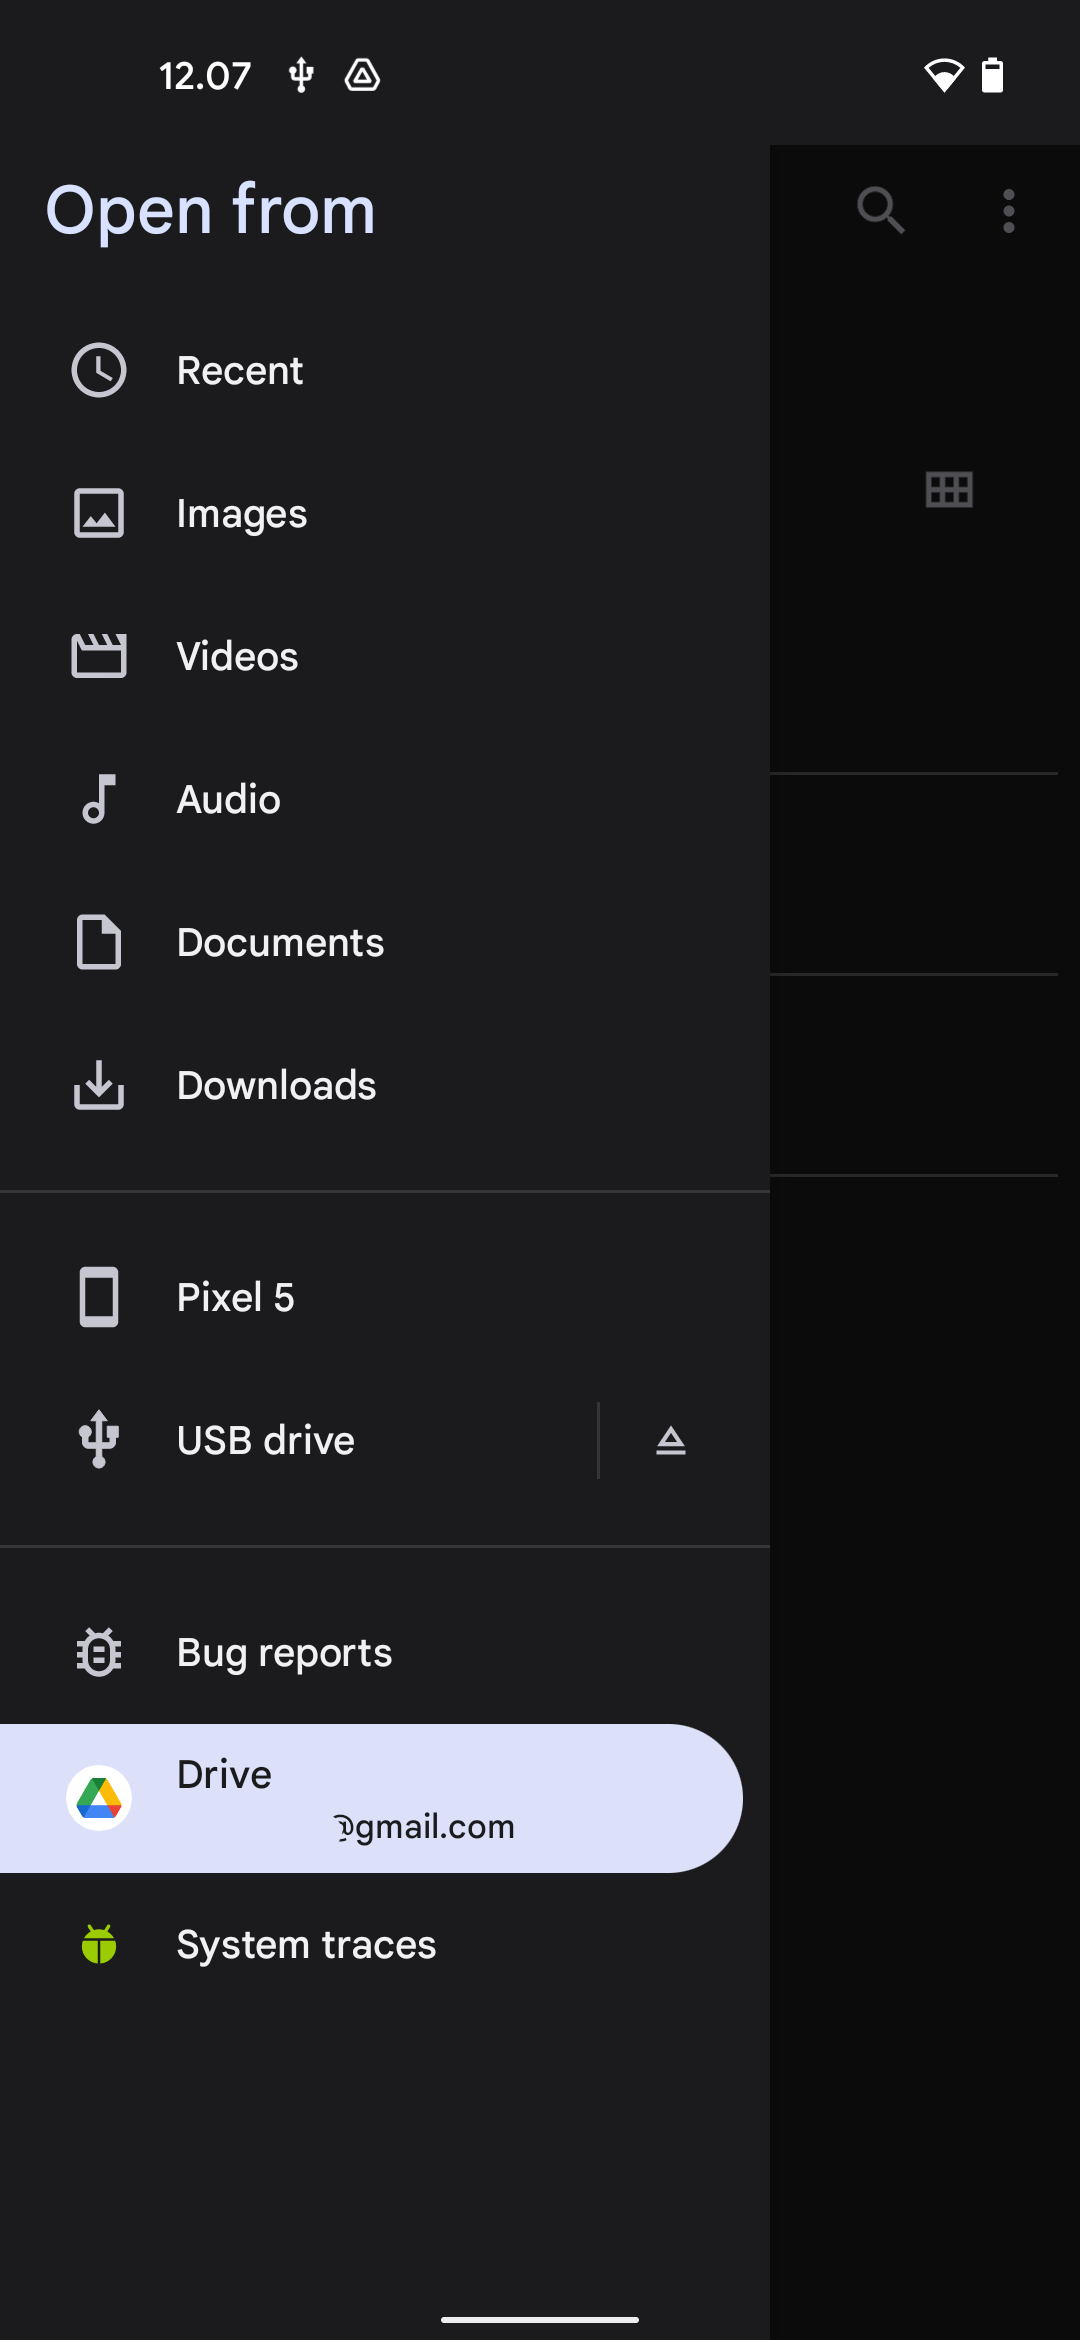
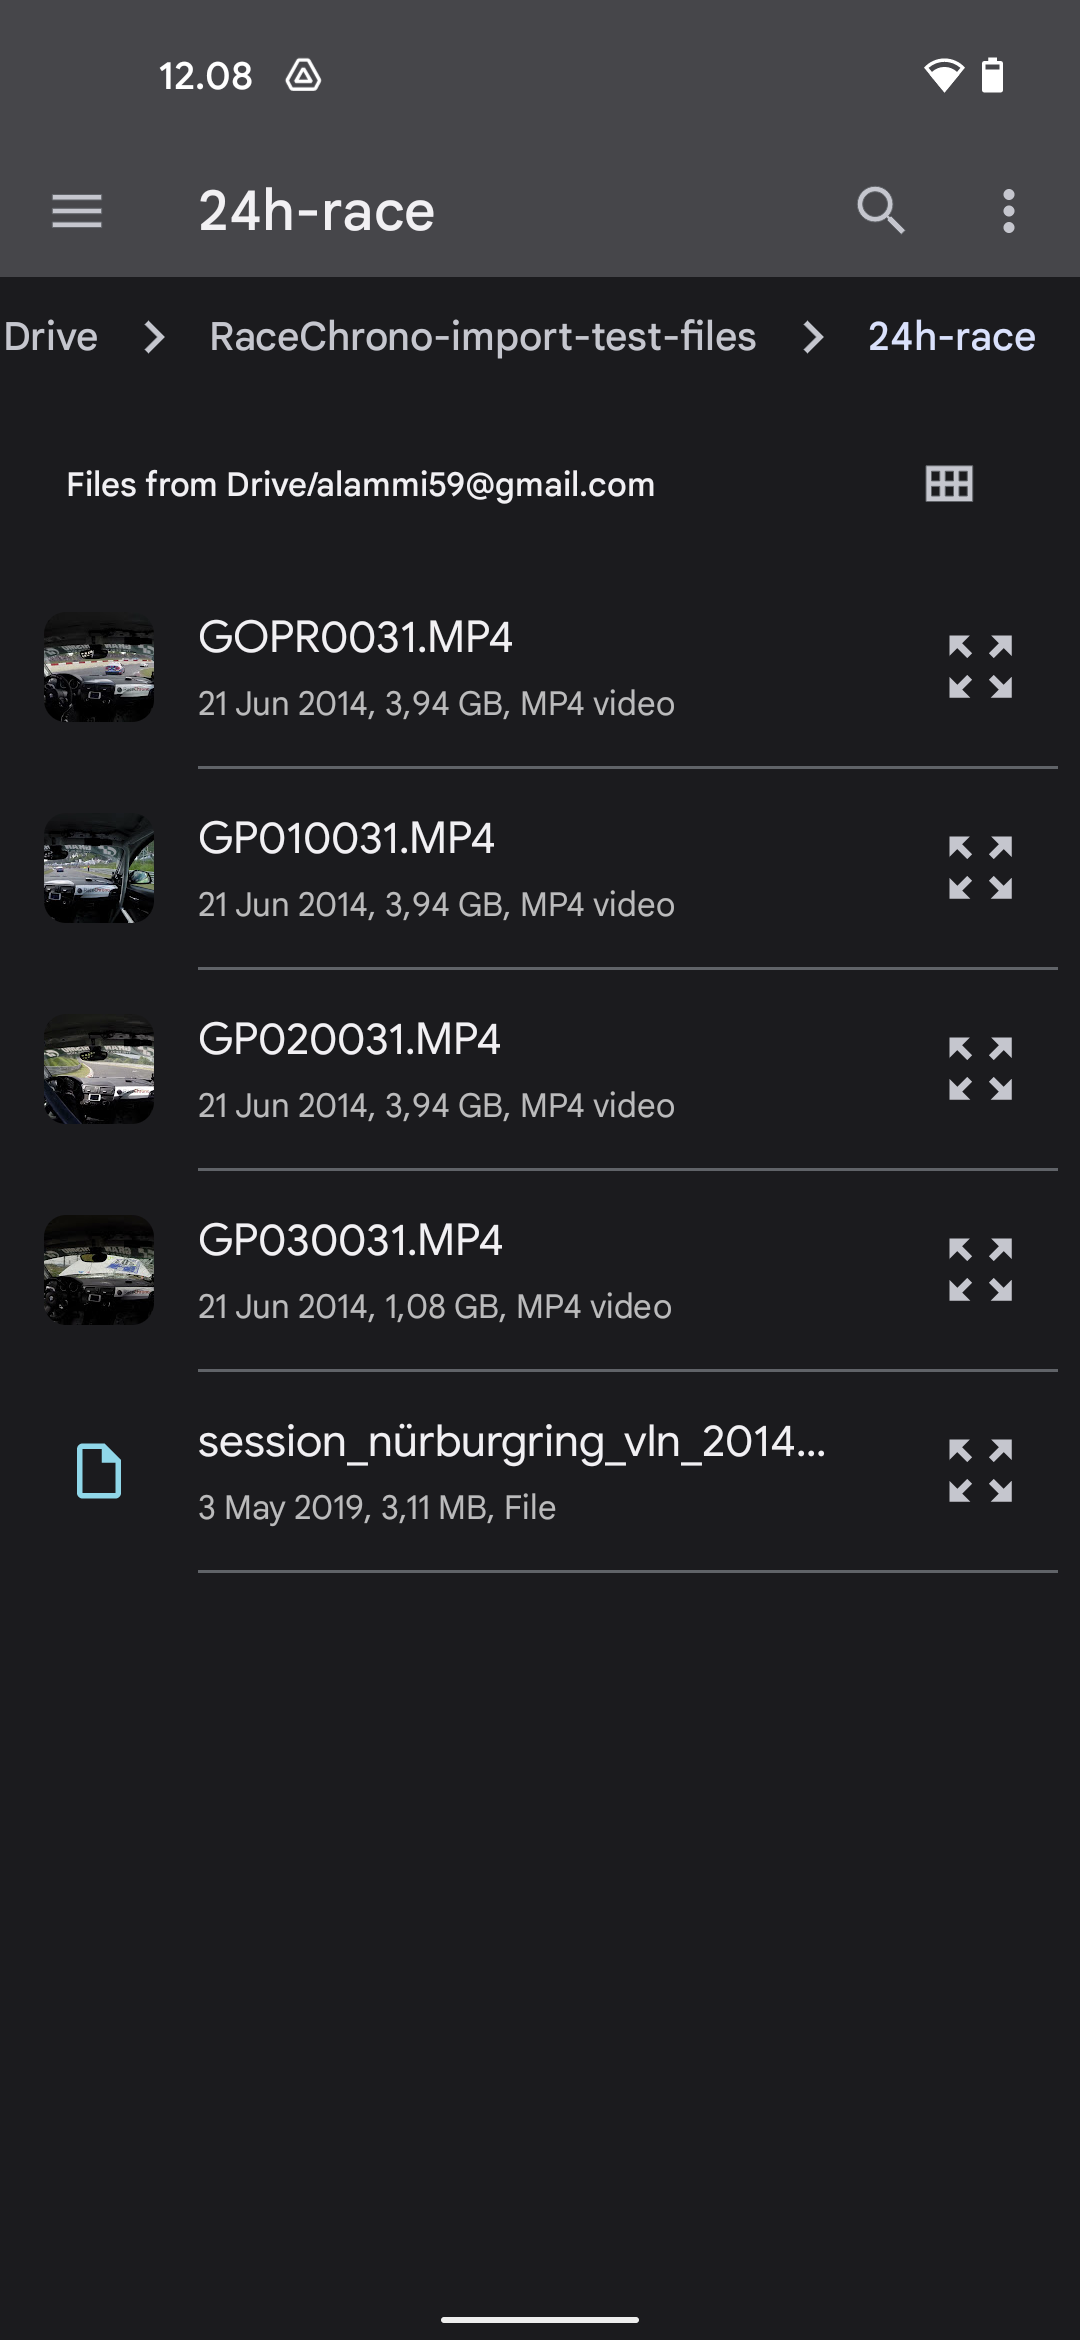
- Open the file browser side menu, and select the “Drive”, and you can see your files. Now select your files, and they will appear on the Import screen.
- After all files have finished downloading, select “Raw video files only” as the data type, and press “Start” and the you’ll get a simple notification that the files have been copied to the raw videos folder. Go to your session’s video list, and you’ll see the copied files under the “Internal storage”. Now you’re ready to link and synchronise the video files to your session.
C. iPhone/iPad: Importing video files using iTunes
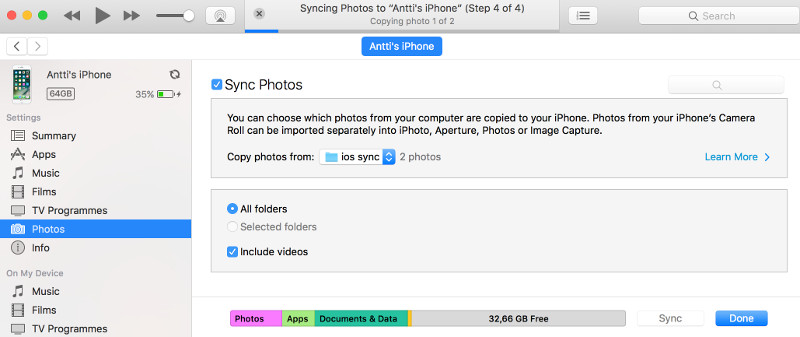
- Open iTunes and go to your device. Open “Settings > Photos” from the left hand menu.
- Enable “Sync photos” and “Include videos”.
- Select “Copy photos from” folder of your choosing.
- Copy your video files to the folder in 3) and select “Sync”.
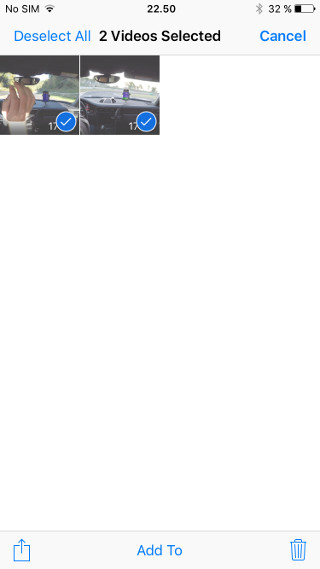
- The imported videos will appear to an album named according the folder in step 3) in the Photos app. Select the files and add them to an album named “RaceChrono”.
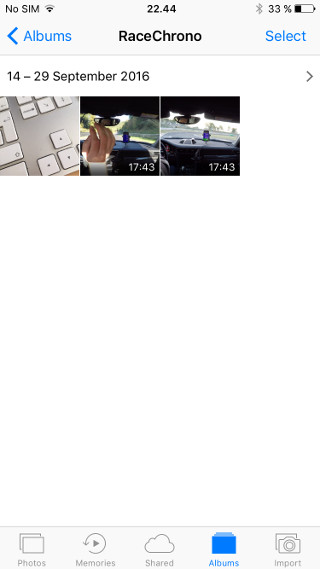
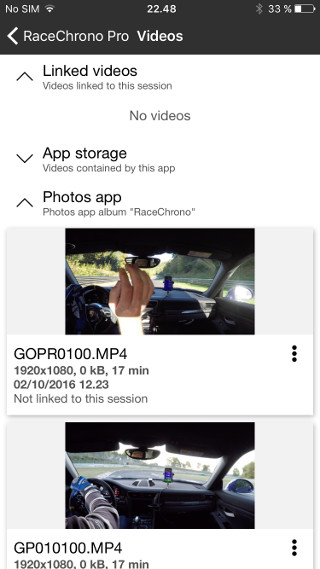
- The video files in “RaceChrono” album will be available under “Photos app” in RaceChrono’s video list.